Please select the topic below
How To Open Driver's Menu Bar
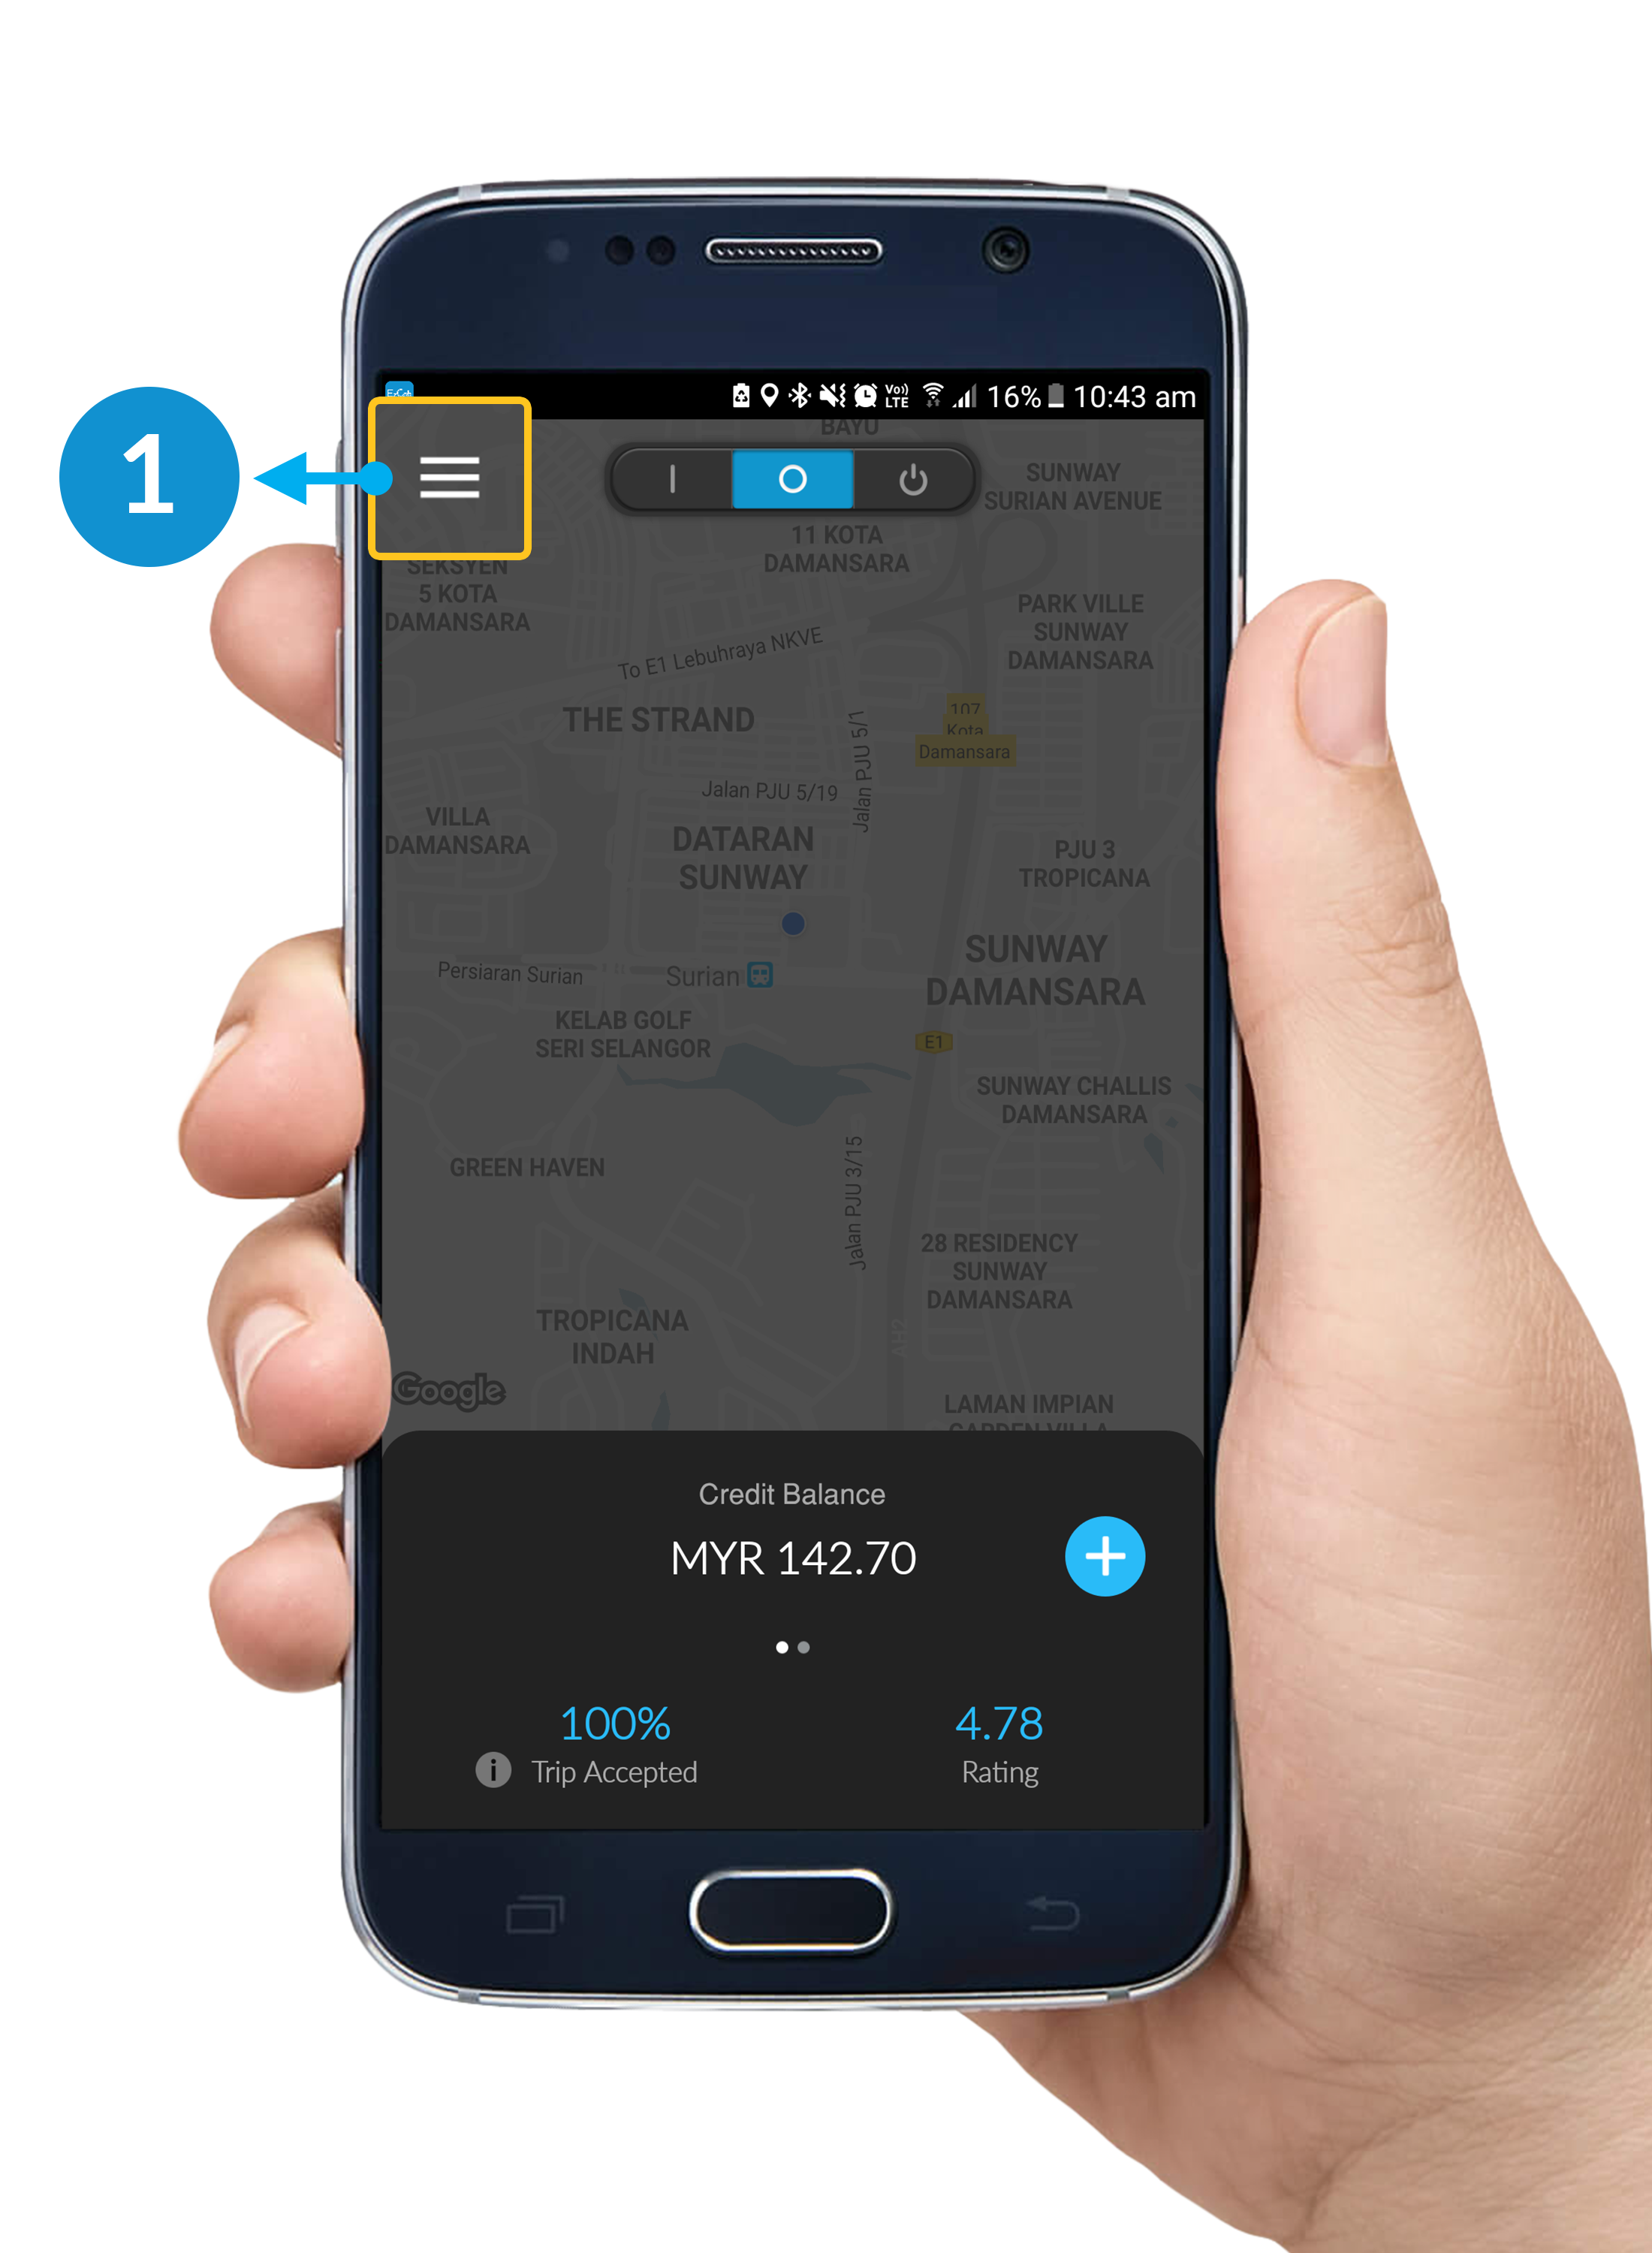
Step 1
To open driver's menu bar, click the button on your upper-left corner.
*Please make sure that you're on Standby Mode.
Step 2
After clicking the menu button, driver's menu bar will slide from left.
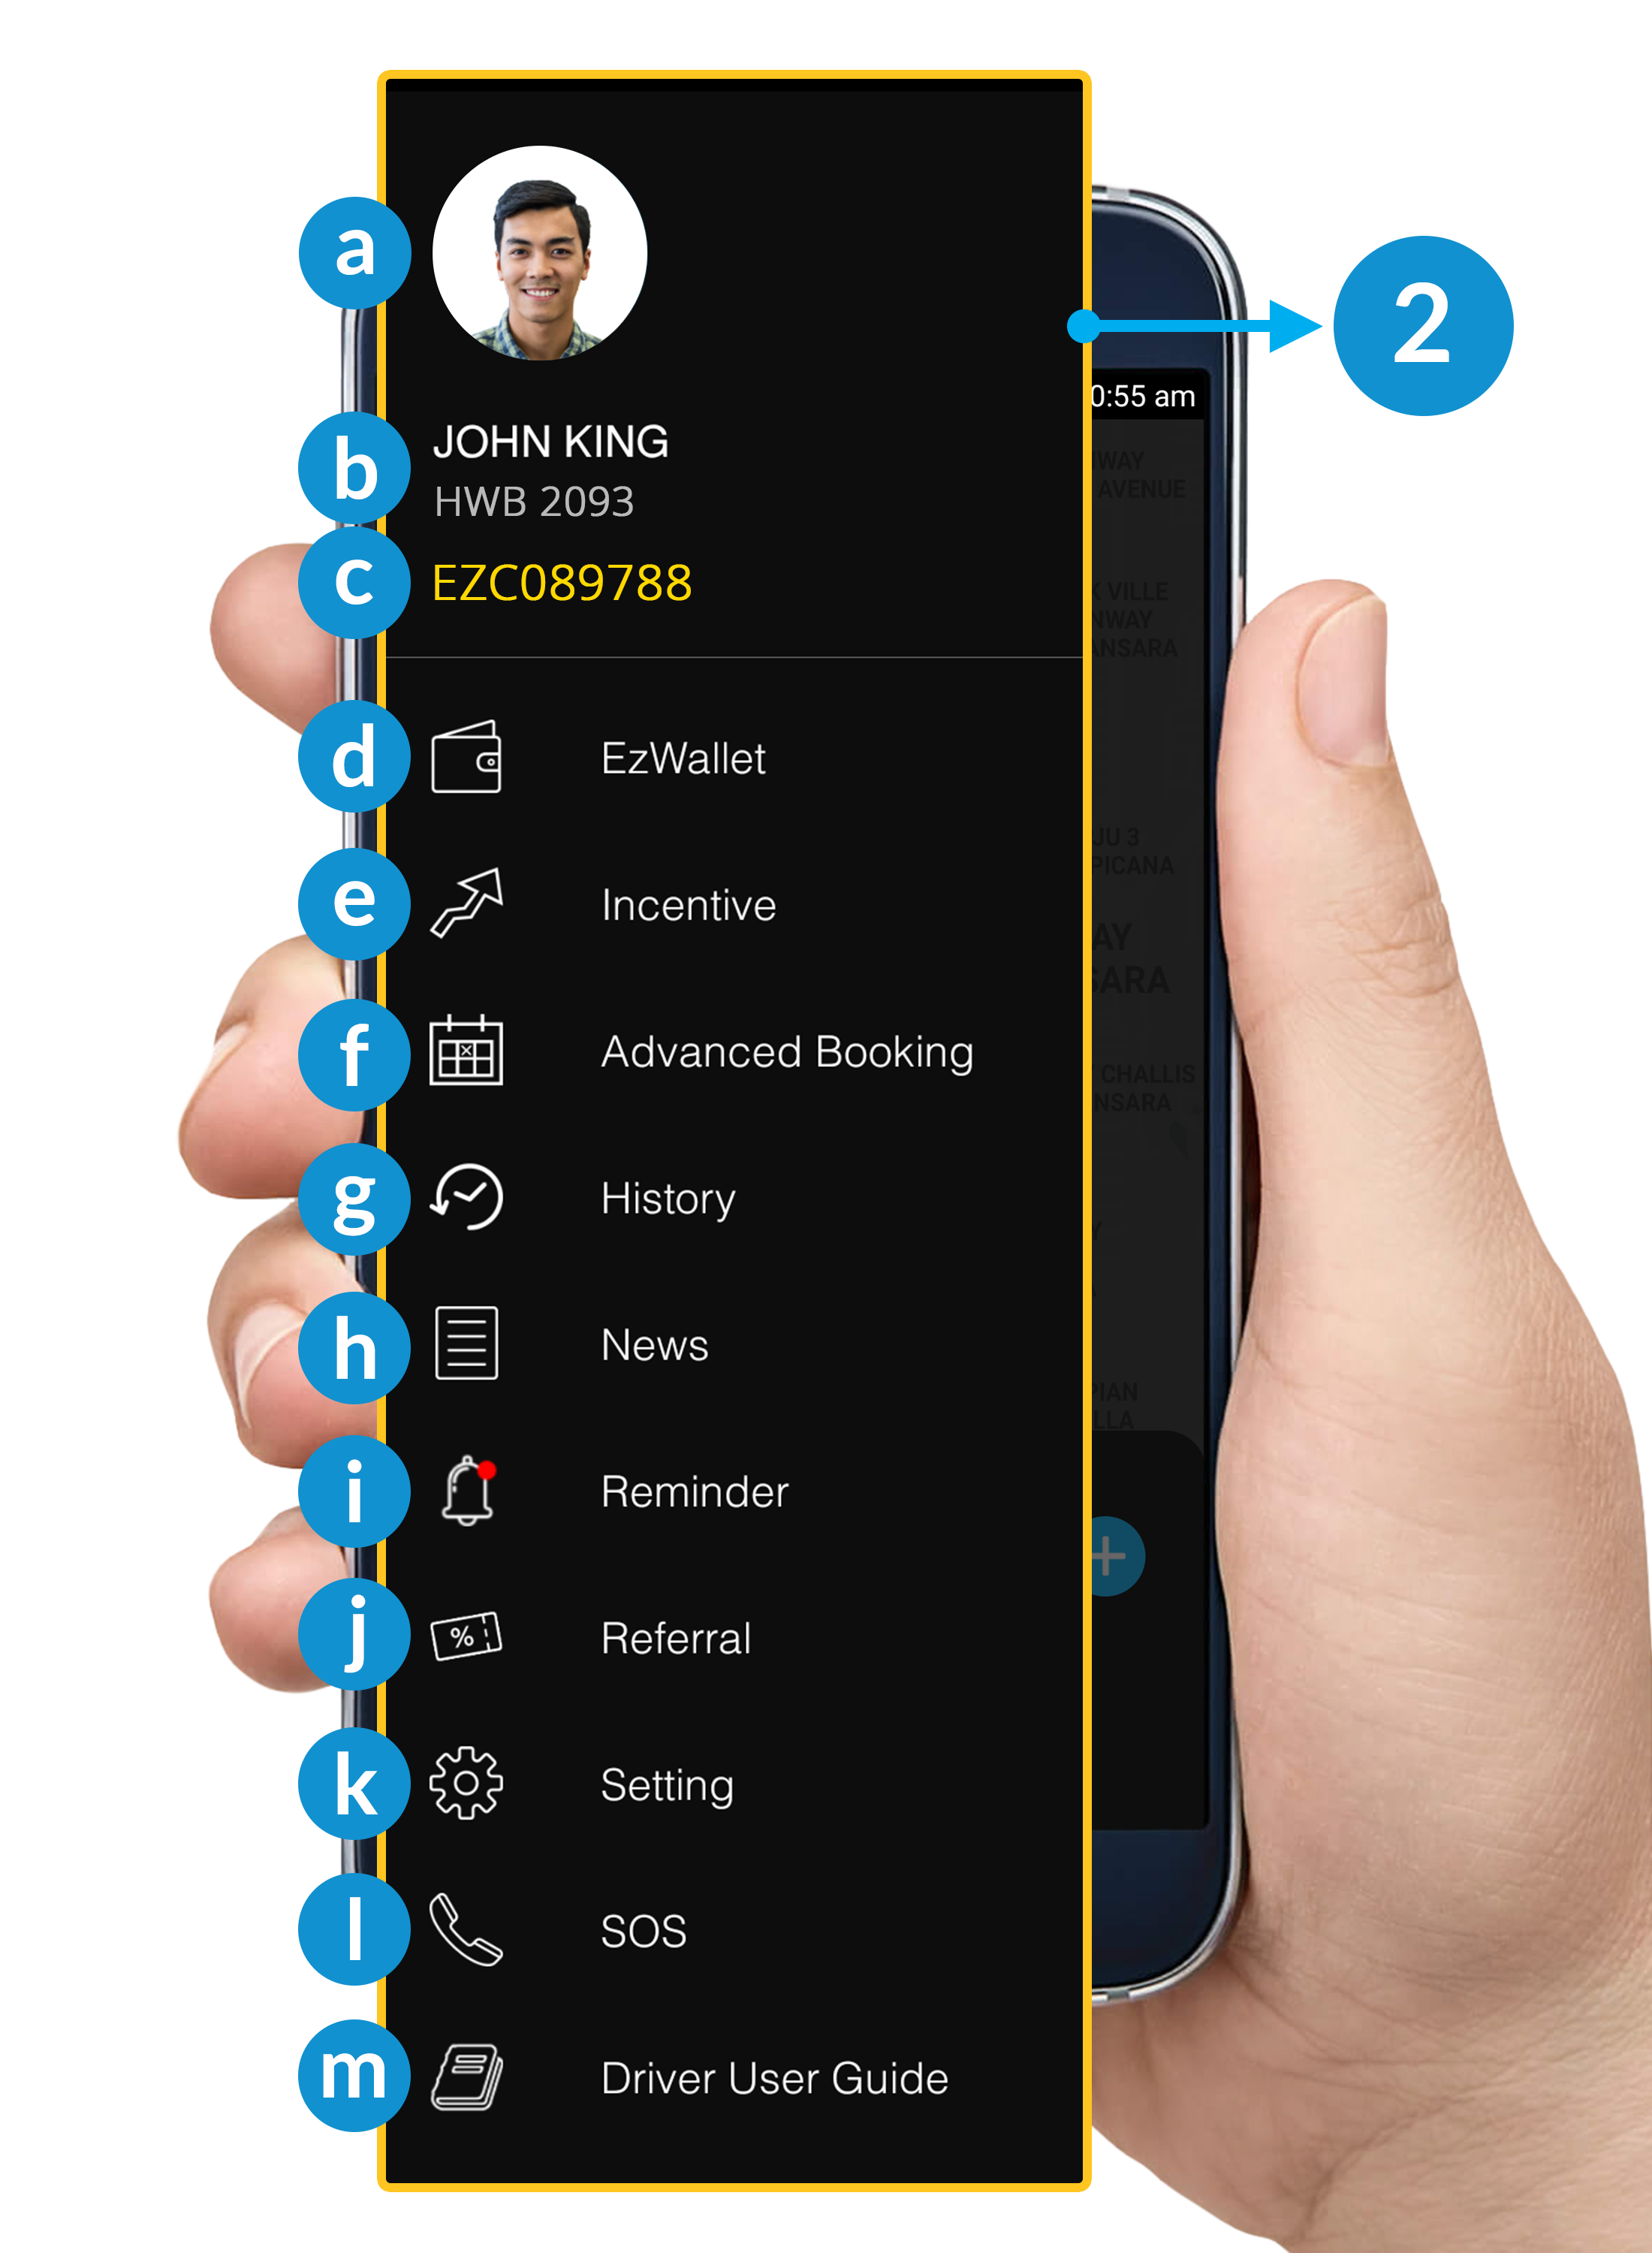
Driver's Menu Bar
a. Profile Picture
b. Profile Detail: Name & Car details.
c. EVP No. : Your E-hailing Vehicle Number will show here.
d. EzWallet: To top up and cash out your credit, view here for details
e. Incentive: Aimed to encourage and help you to earn more
f. Advance Booking: To view all your booking reservation from customers.
g. History: To view all your previous order.
h. News: Latest news announced by EzCab.
i. Reminder: To remind you update expiry date of your documents.
j. Referral: Share your referral code to user to earn incentive.
k. Setting: To view your profile detail and change or update your EzDriver App.
l. SOS: Emergency button. Click to request help if you're facing any trouble.
m. Driver User Guide: Refer all Guidelines here.
How To Check Advance Booking
Step 1
Click the button on your upper-left corner.
*Please make sure that you're on Standby Mode.
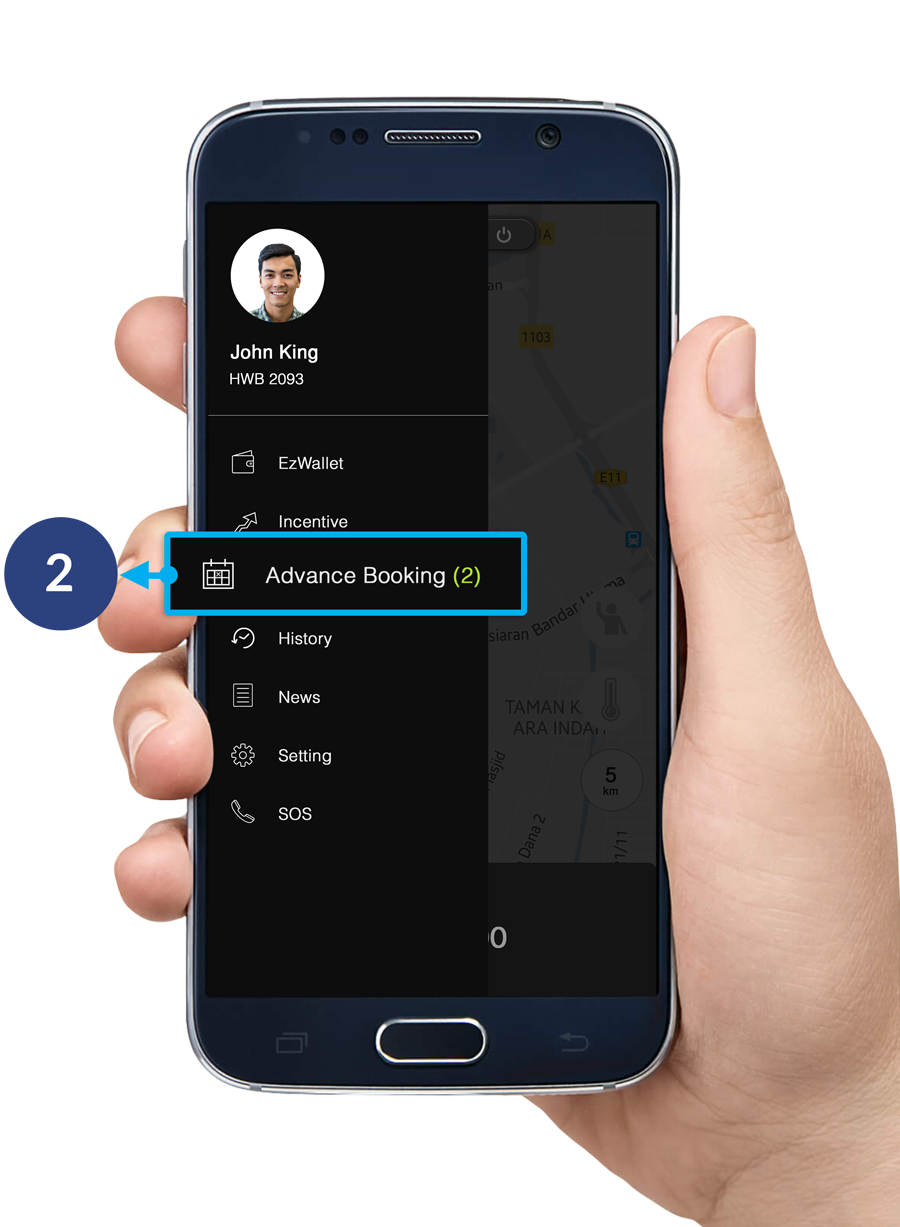
Step 2
Click Advance Booking.
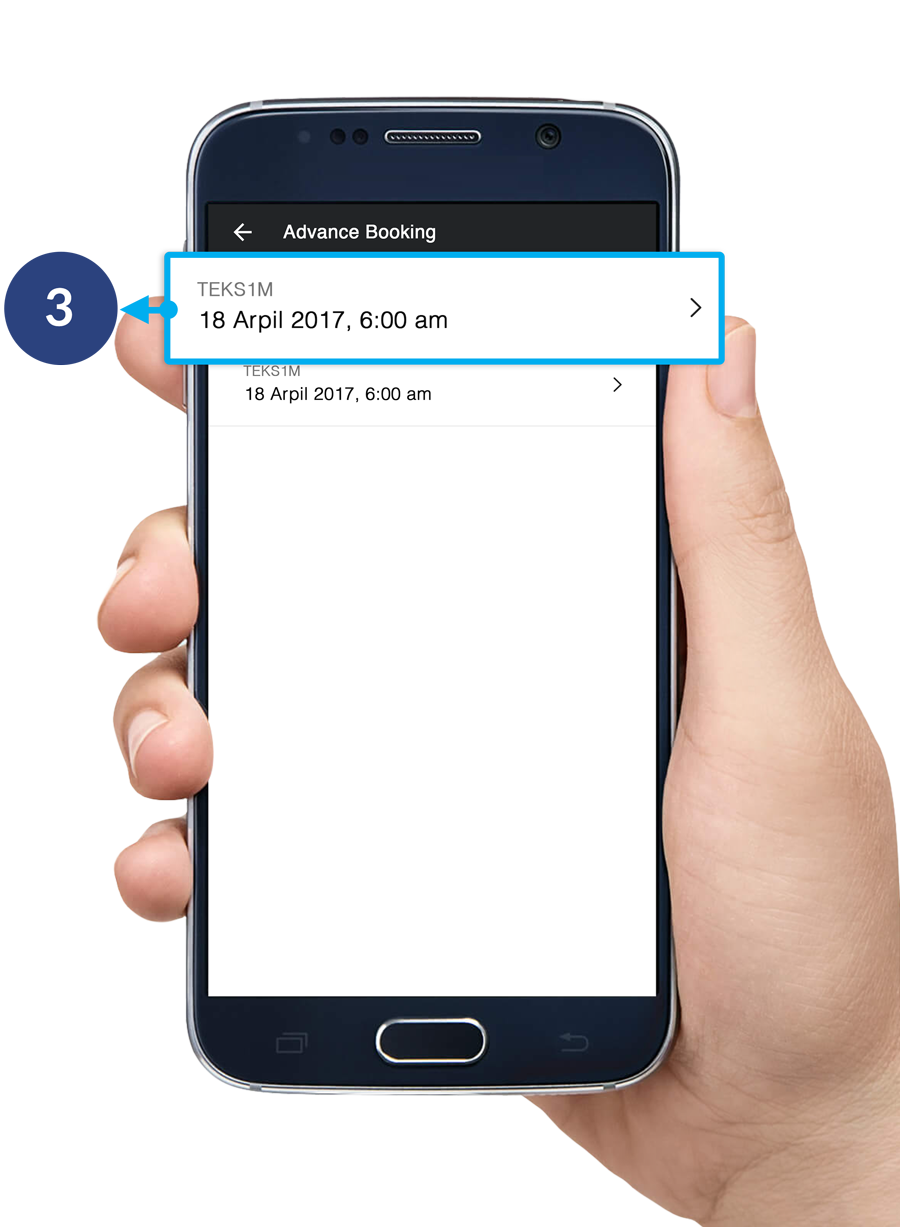
Step 3
This page will show you all of your advance bookings. Click the arrow button on the right to view details for each booking.
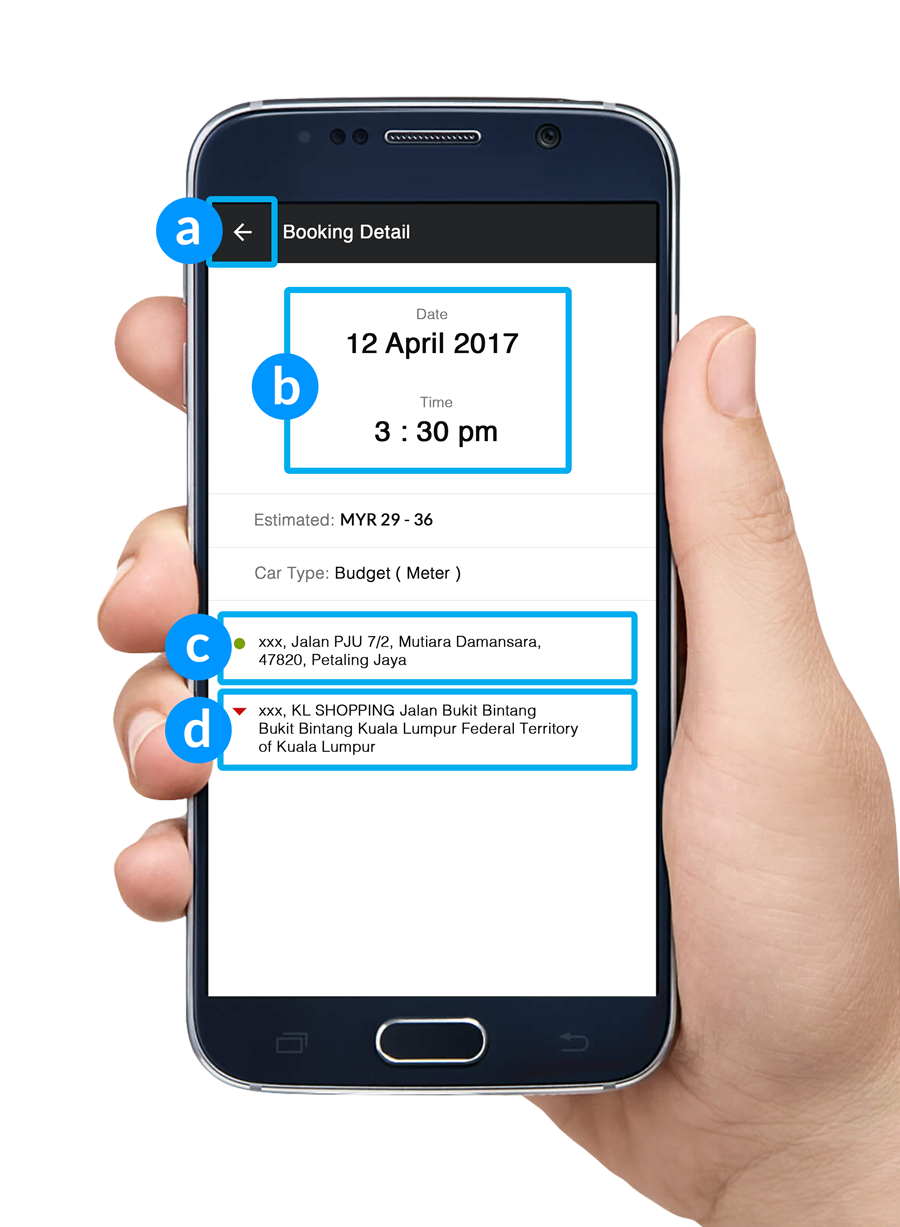
Booking Details
a. Back Button: Back to previous page.
b. Pick Up Date & Time: Date & Time to pick-up customer.
c. Pick Up Address: Location to pick-up customer.
d. Drop Off Address: Location to drop-off customer.
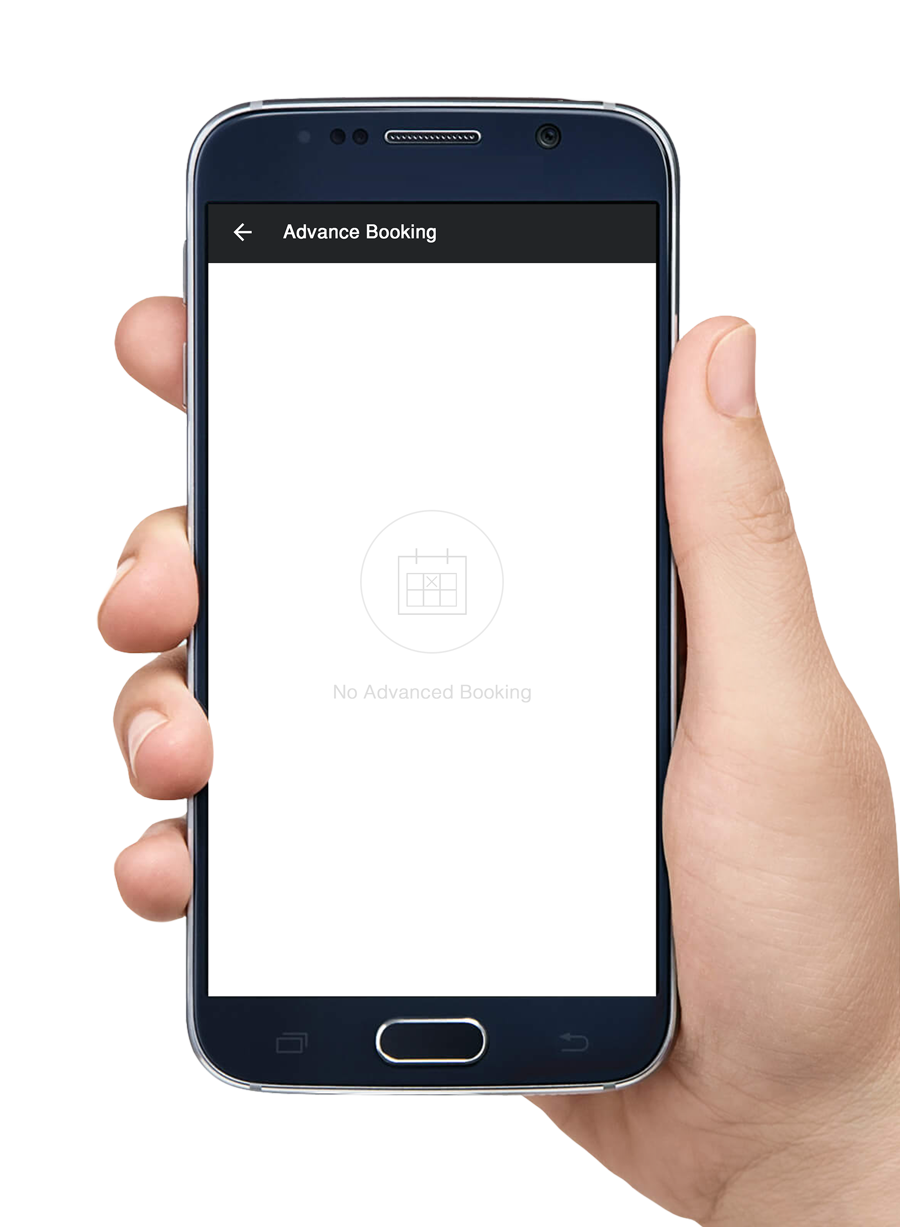
Advance Booking Listing Page
If you do not have any advance booking , the screen will appear as above.
How To Check History
Step 1
Click the button on your upper-left corner.
*Please make sure that you're on Standby Mode.
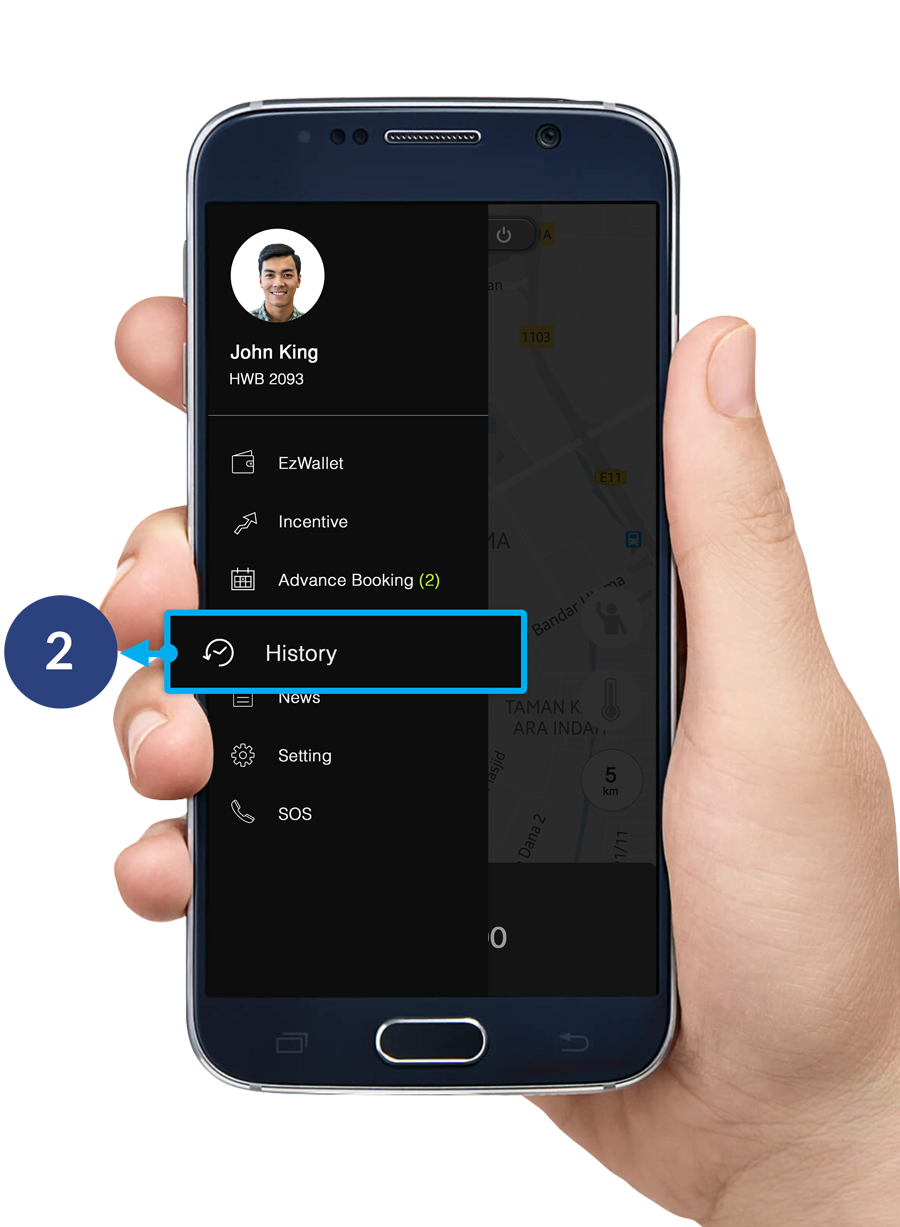
Step 2
Click History.
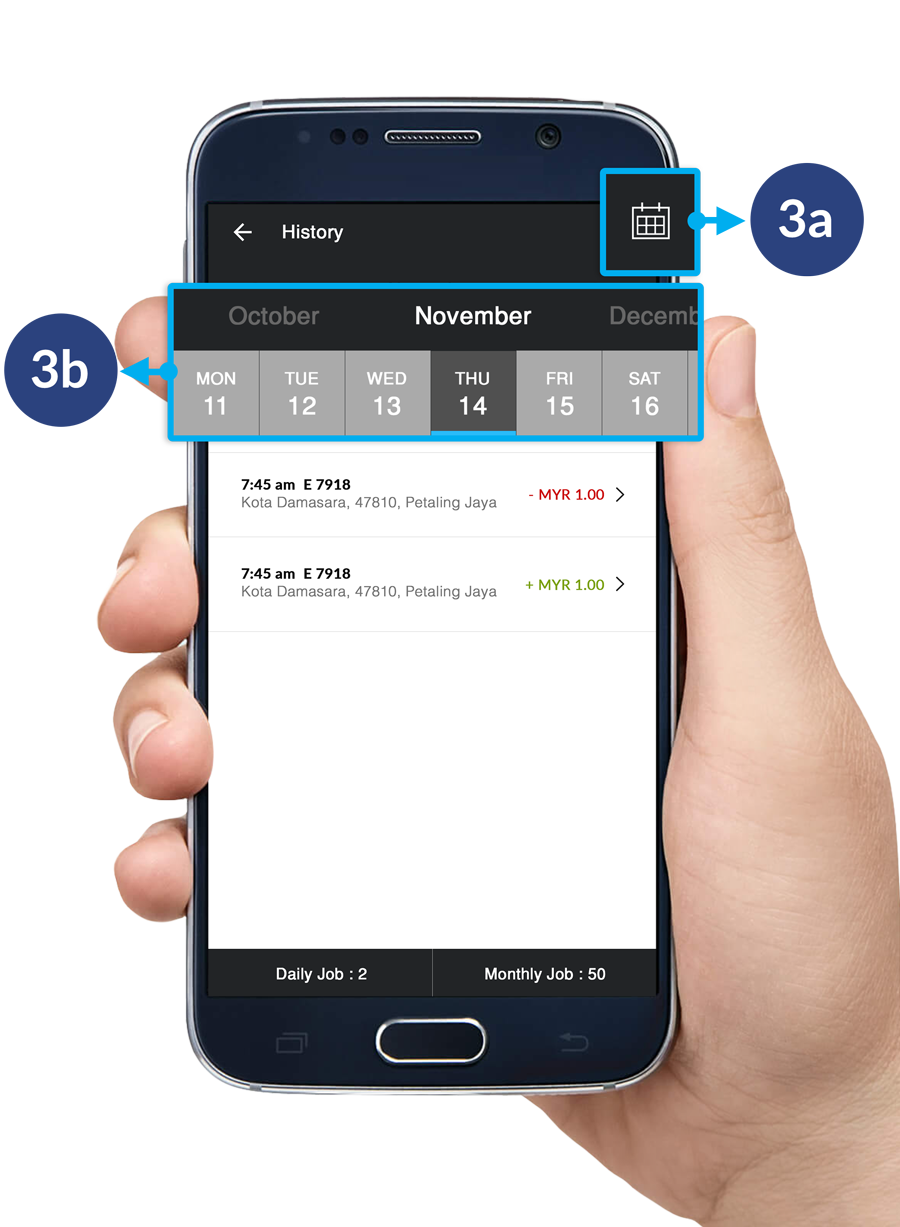
Step 3
This page will show you all of your history. Click on the calendar button on your upper left to view a specific date.
3a. Click the calendar button on your upper-right corner.
3b. Slide the month and date you wish to view.
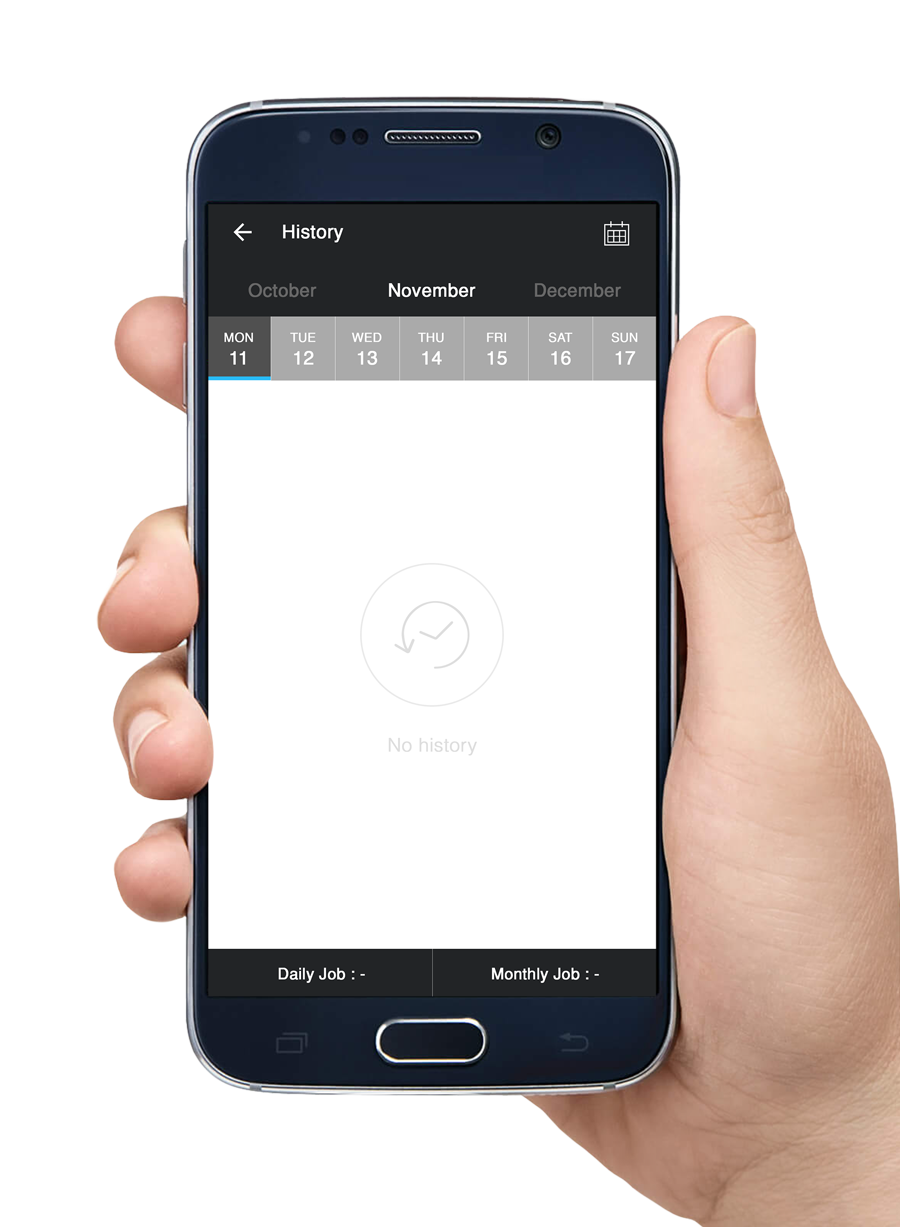
History Listing Page
If you do not have any history order, your screen will appear as above.
How To View Latest News
Step 1
Click the button on your upper-left corner.
*Please make sure that you're on Standby Mode.
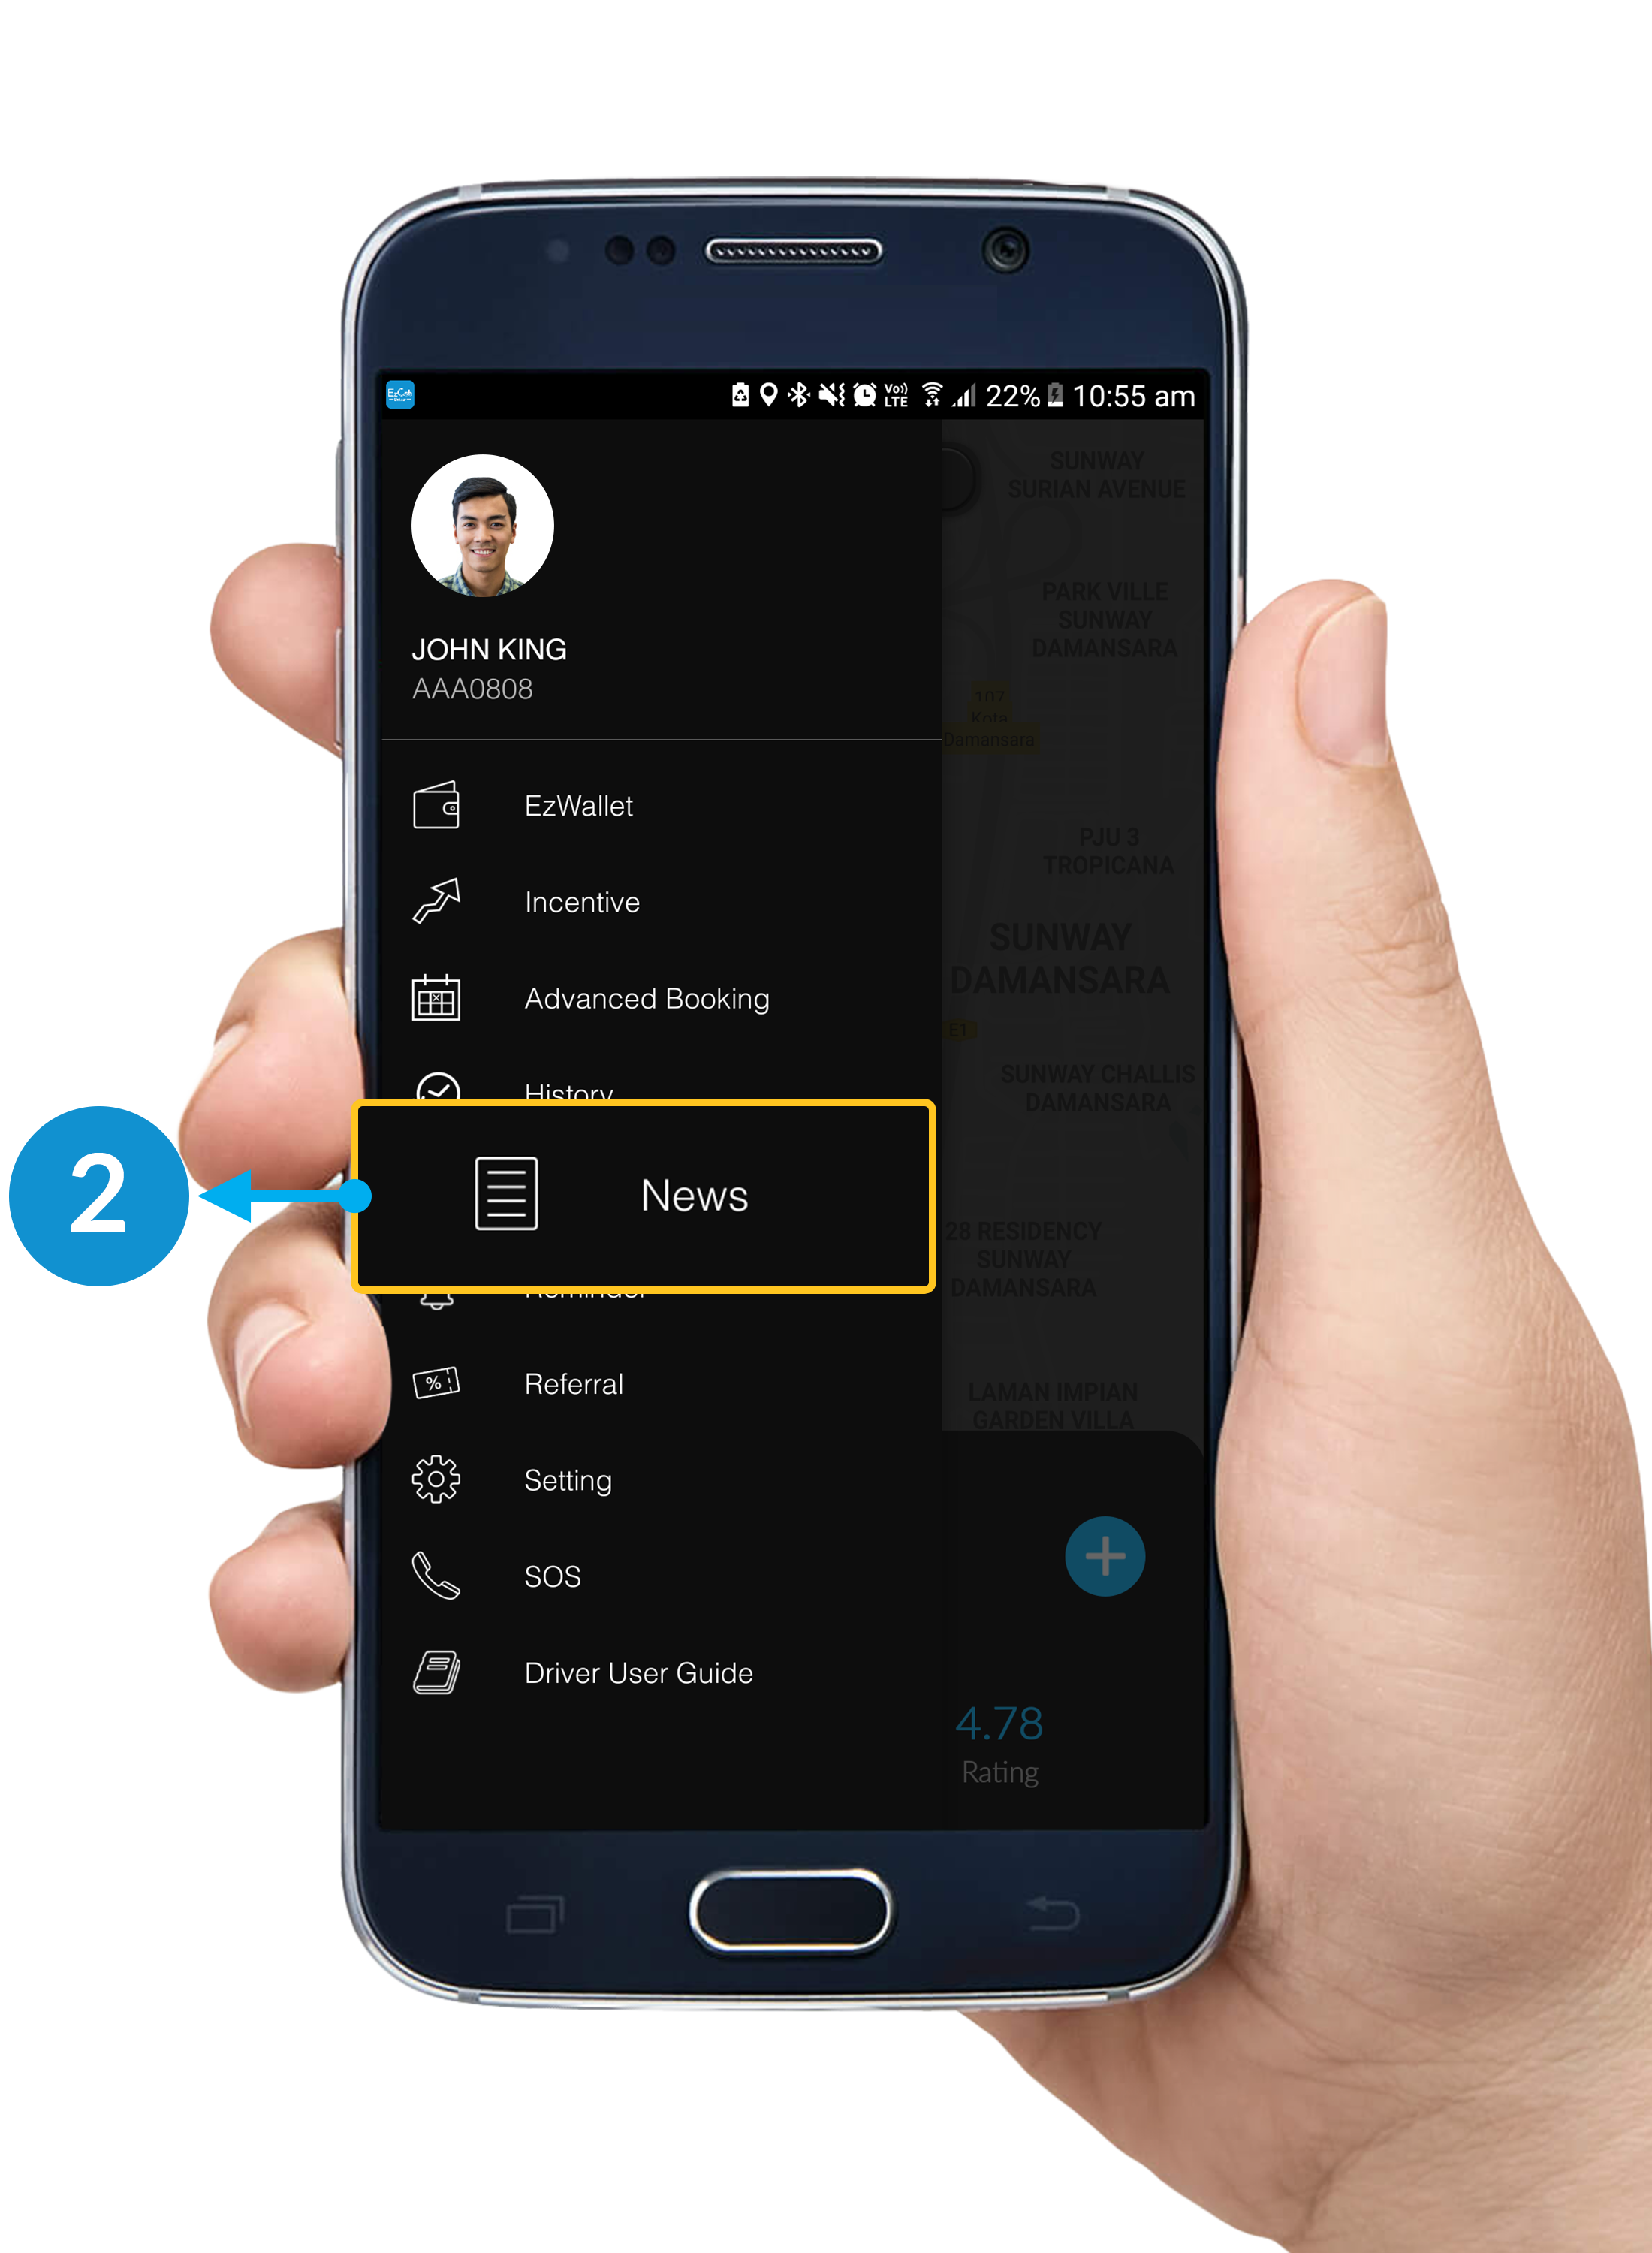
Step 2
Click News.
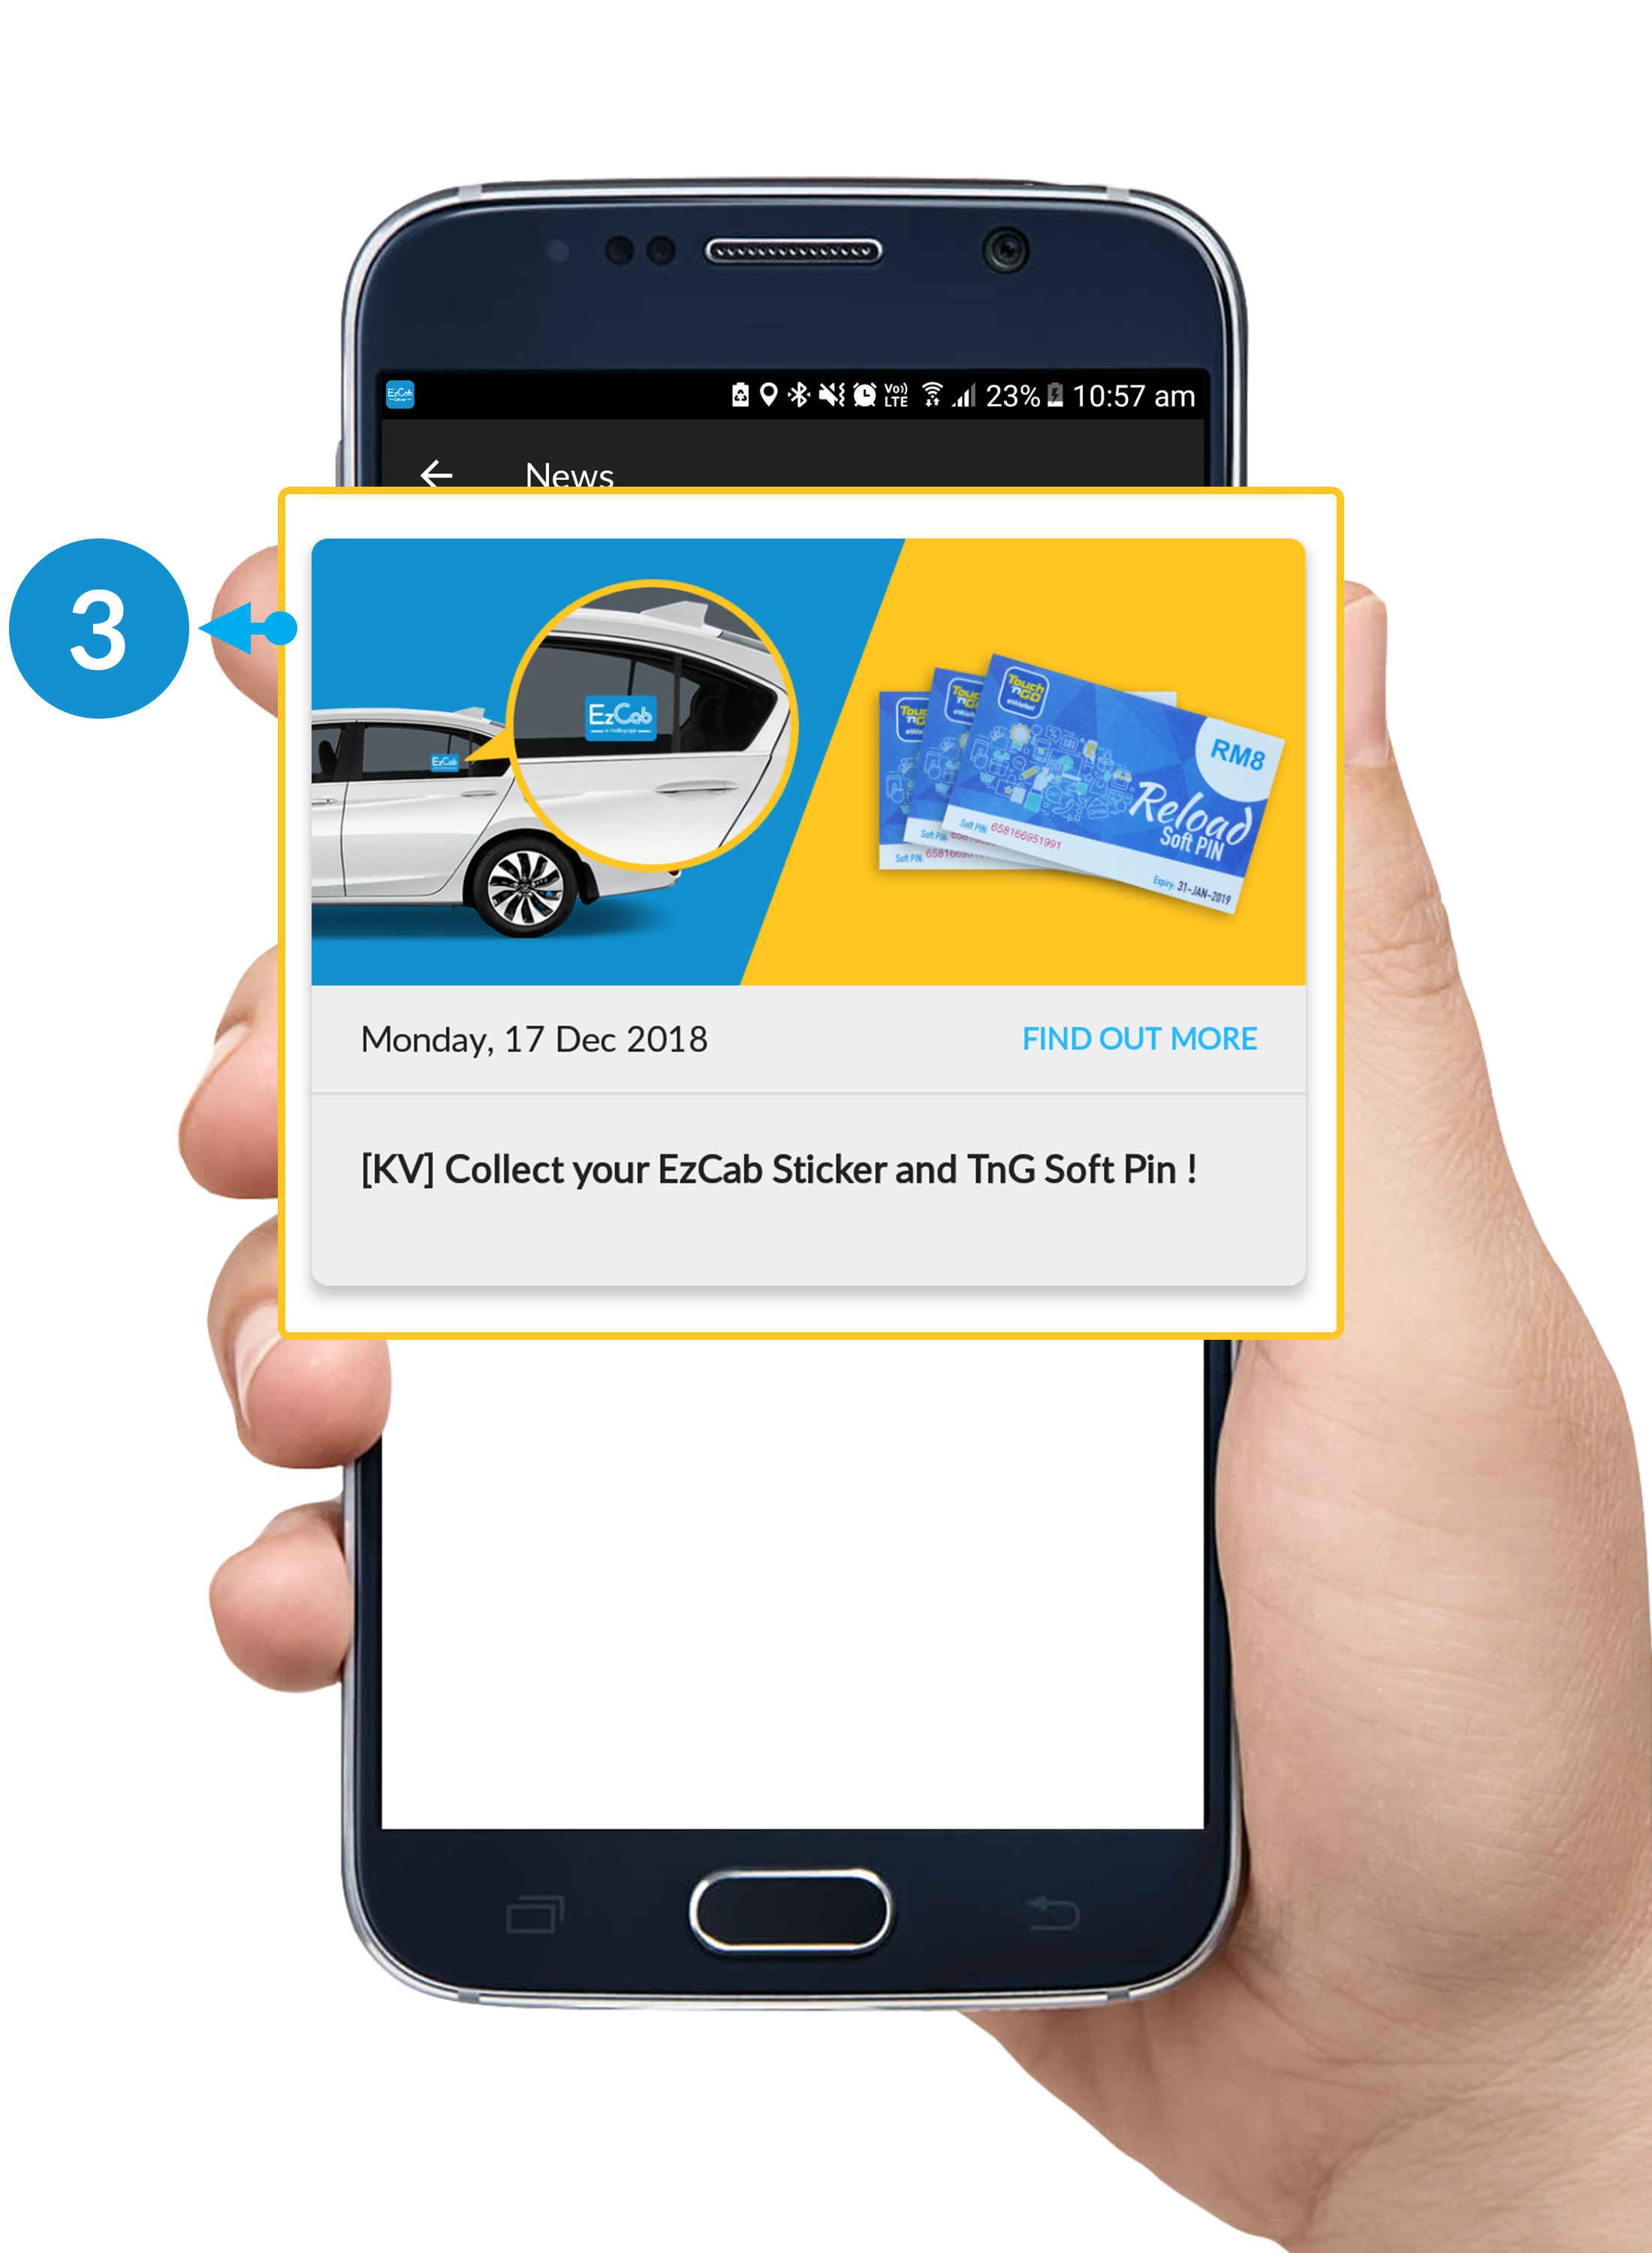
Step 3
This page will show you all your news. To view more details of the news, click on the news.
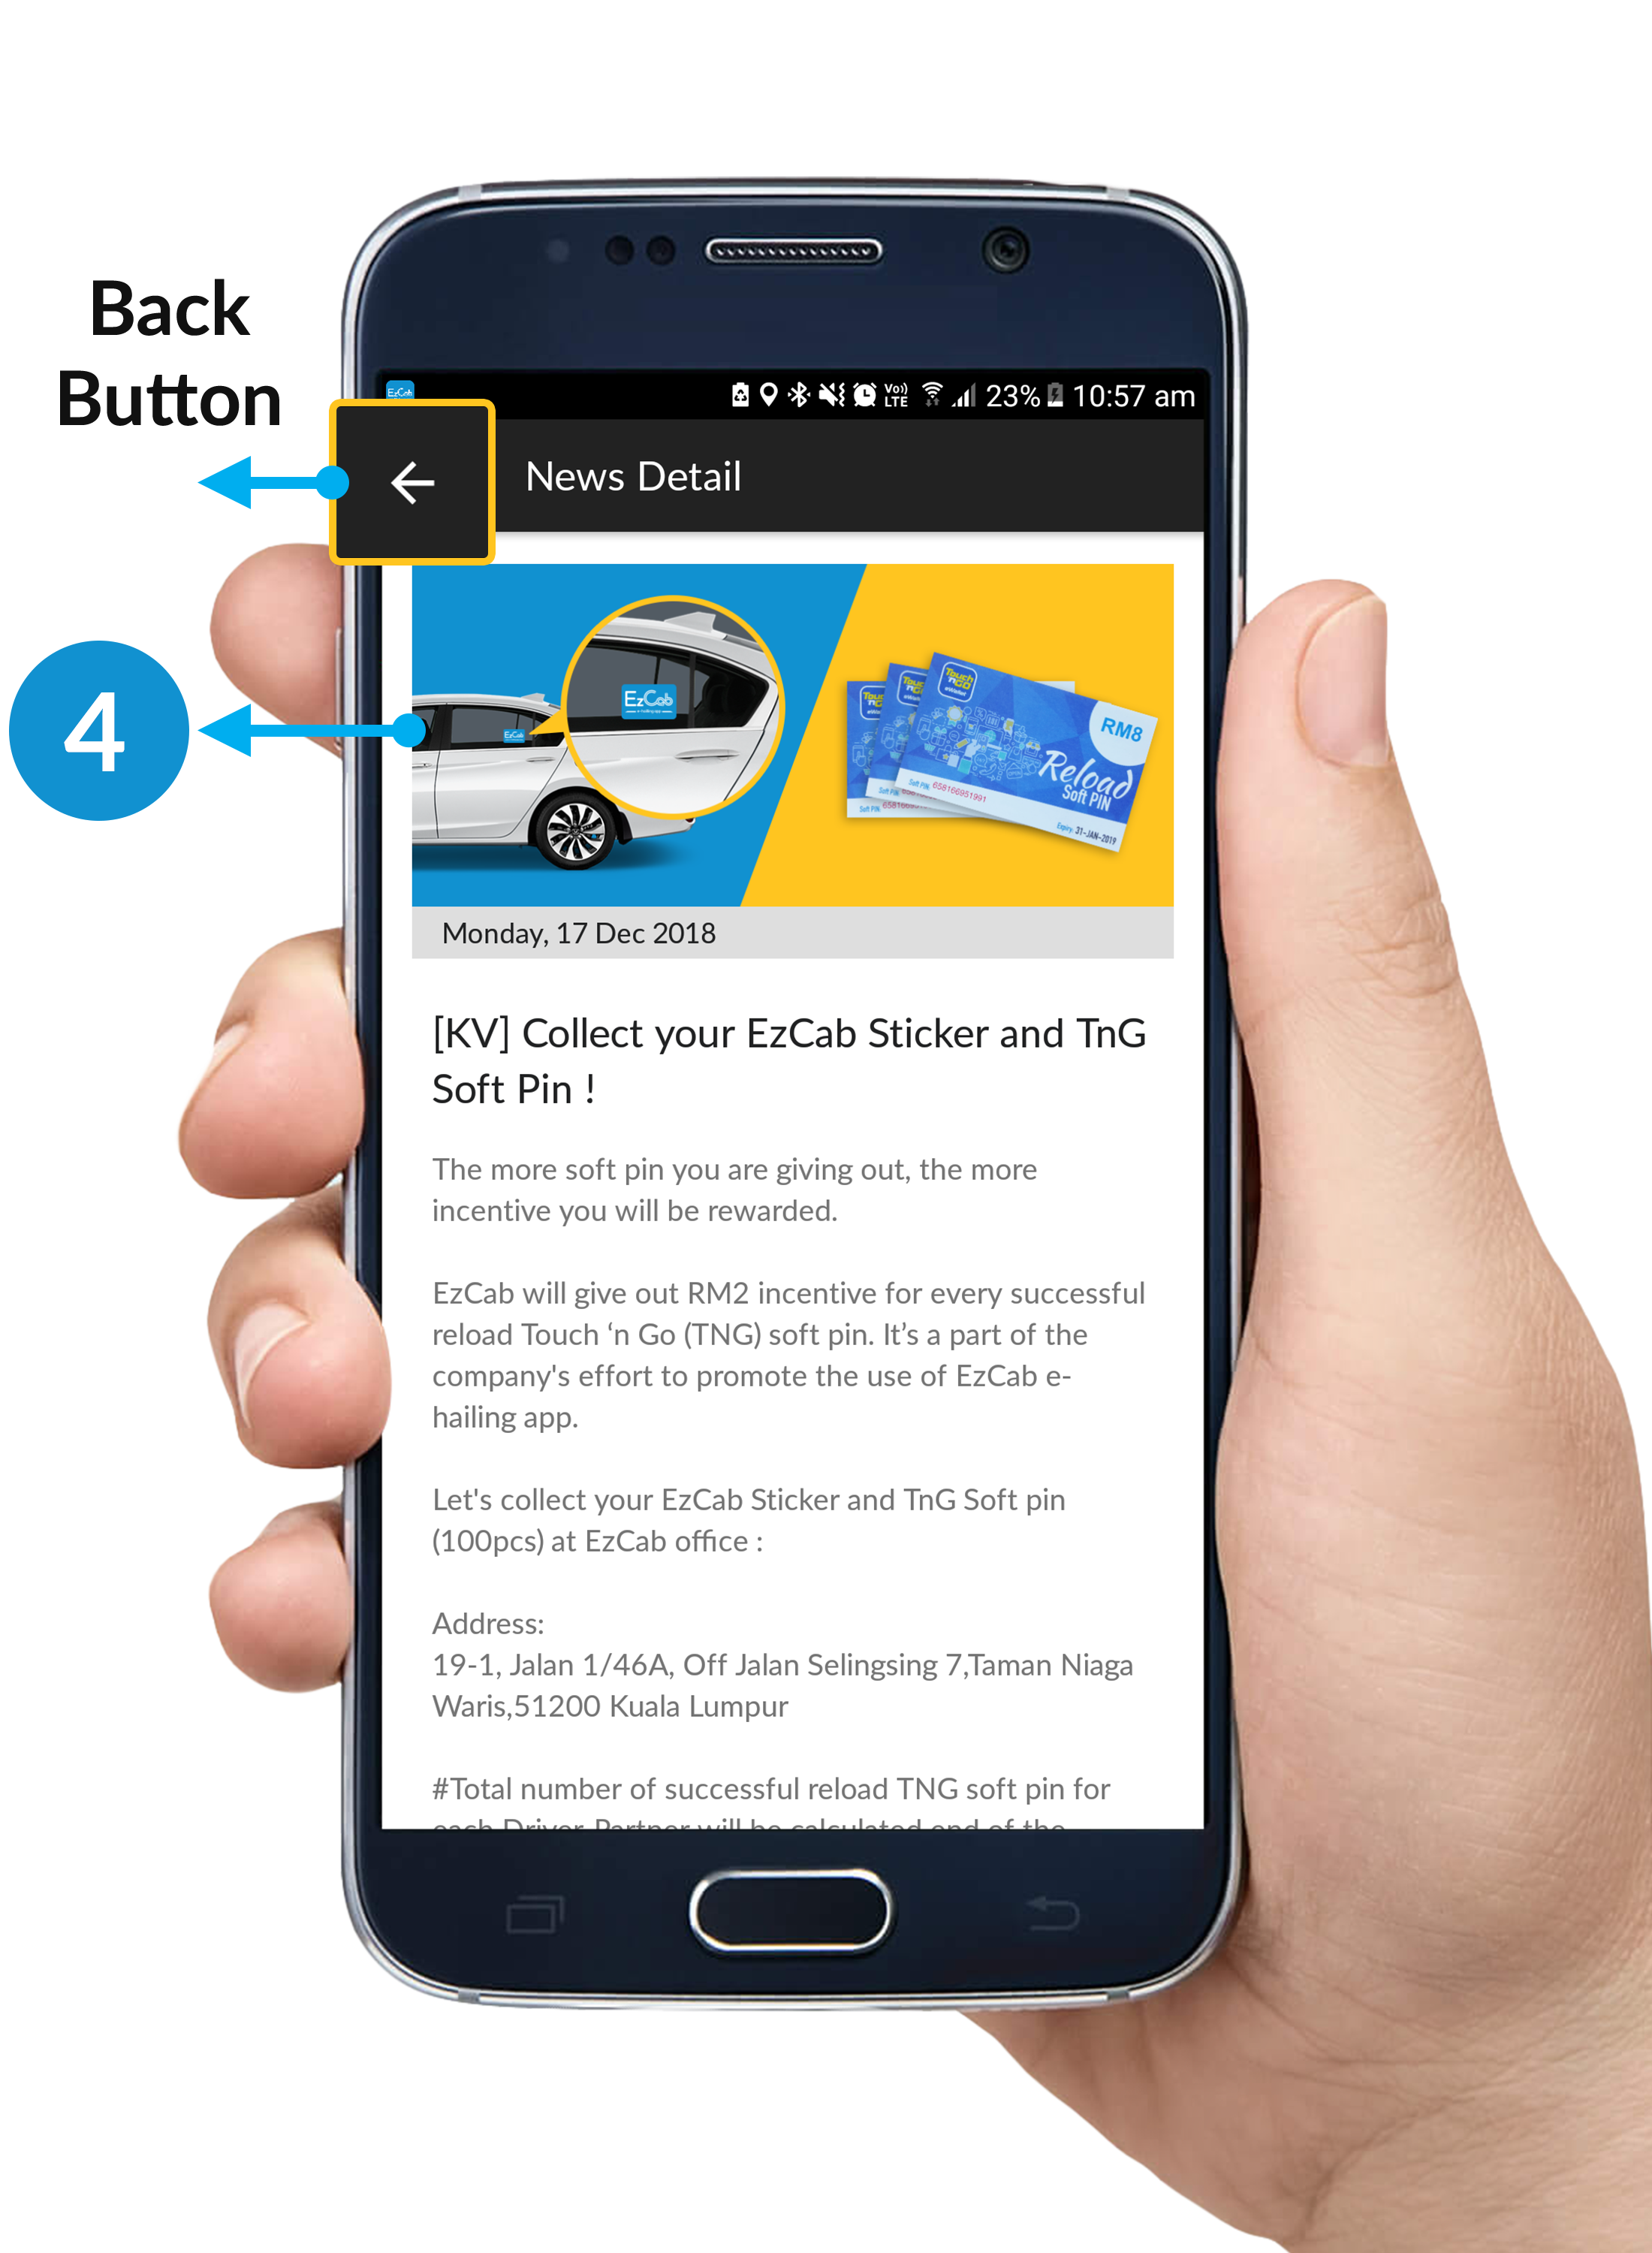
Step 4
This is the news detail.
- Back Button: Back to the previous page.
How To Update Personal Details in Setting
Step 1
Click the button on your upper-left corner.
*Please make sure that you're on Standby Mode.
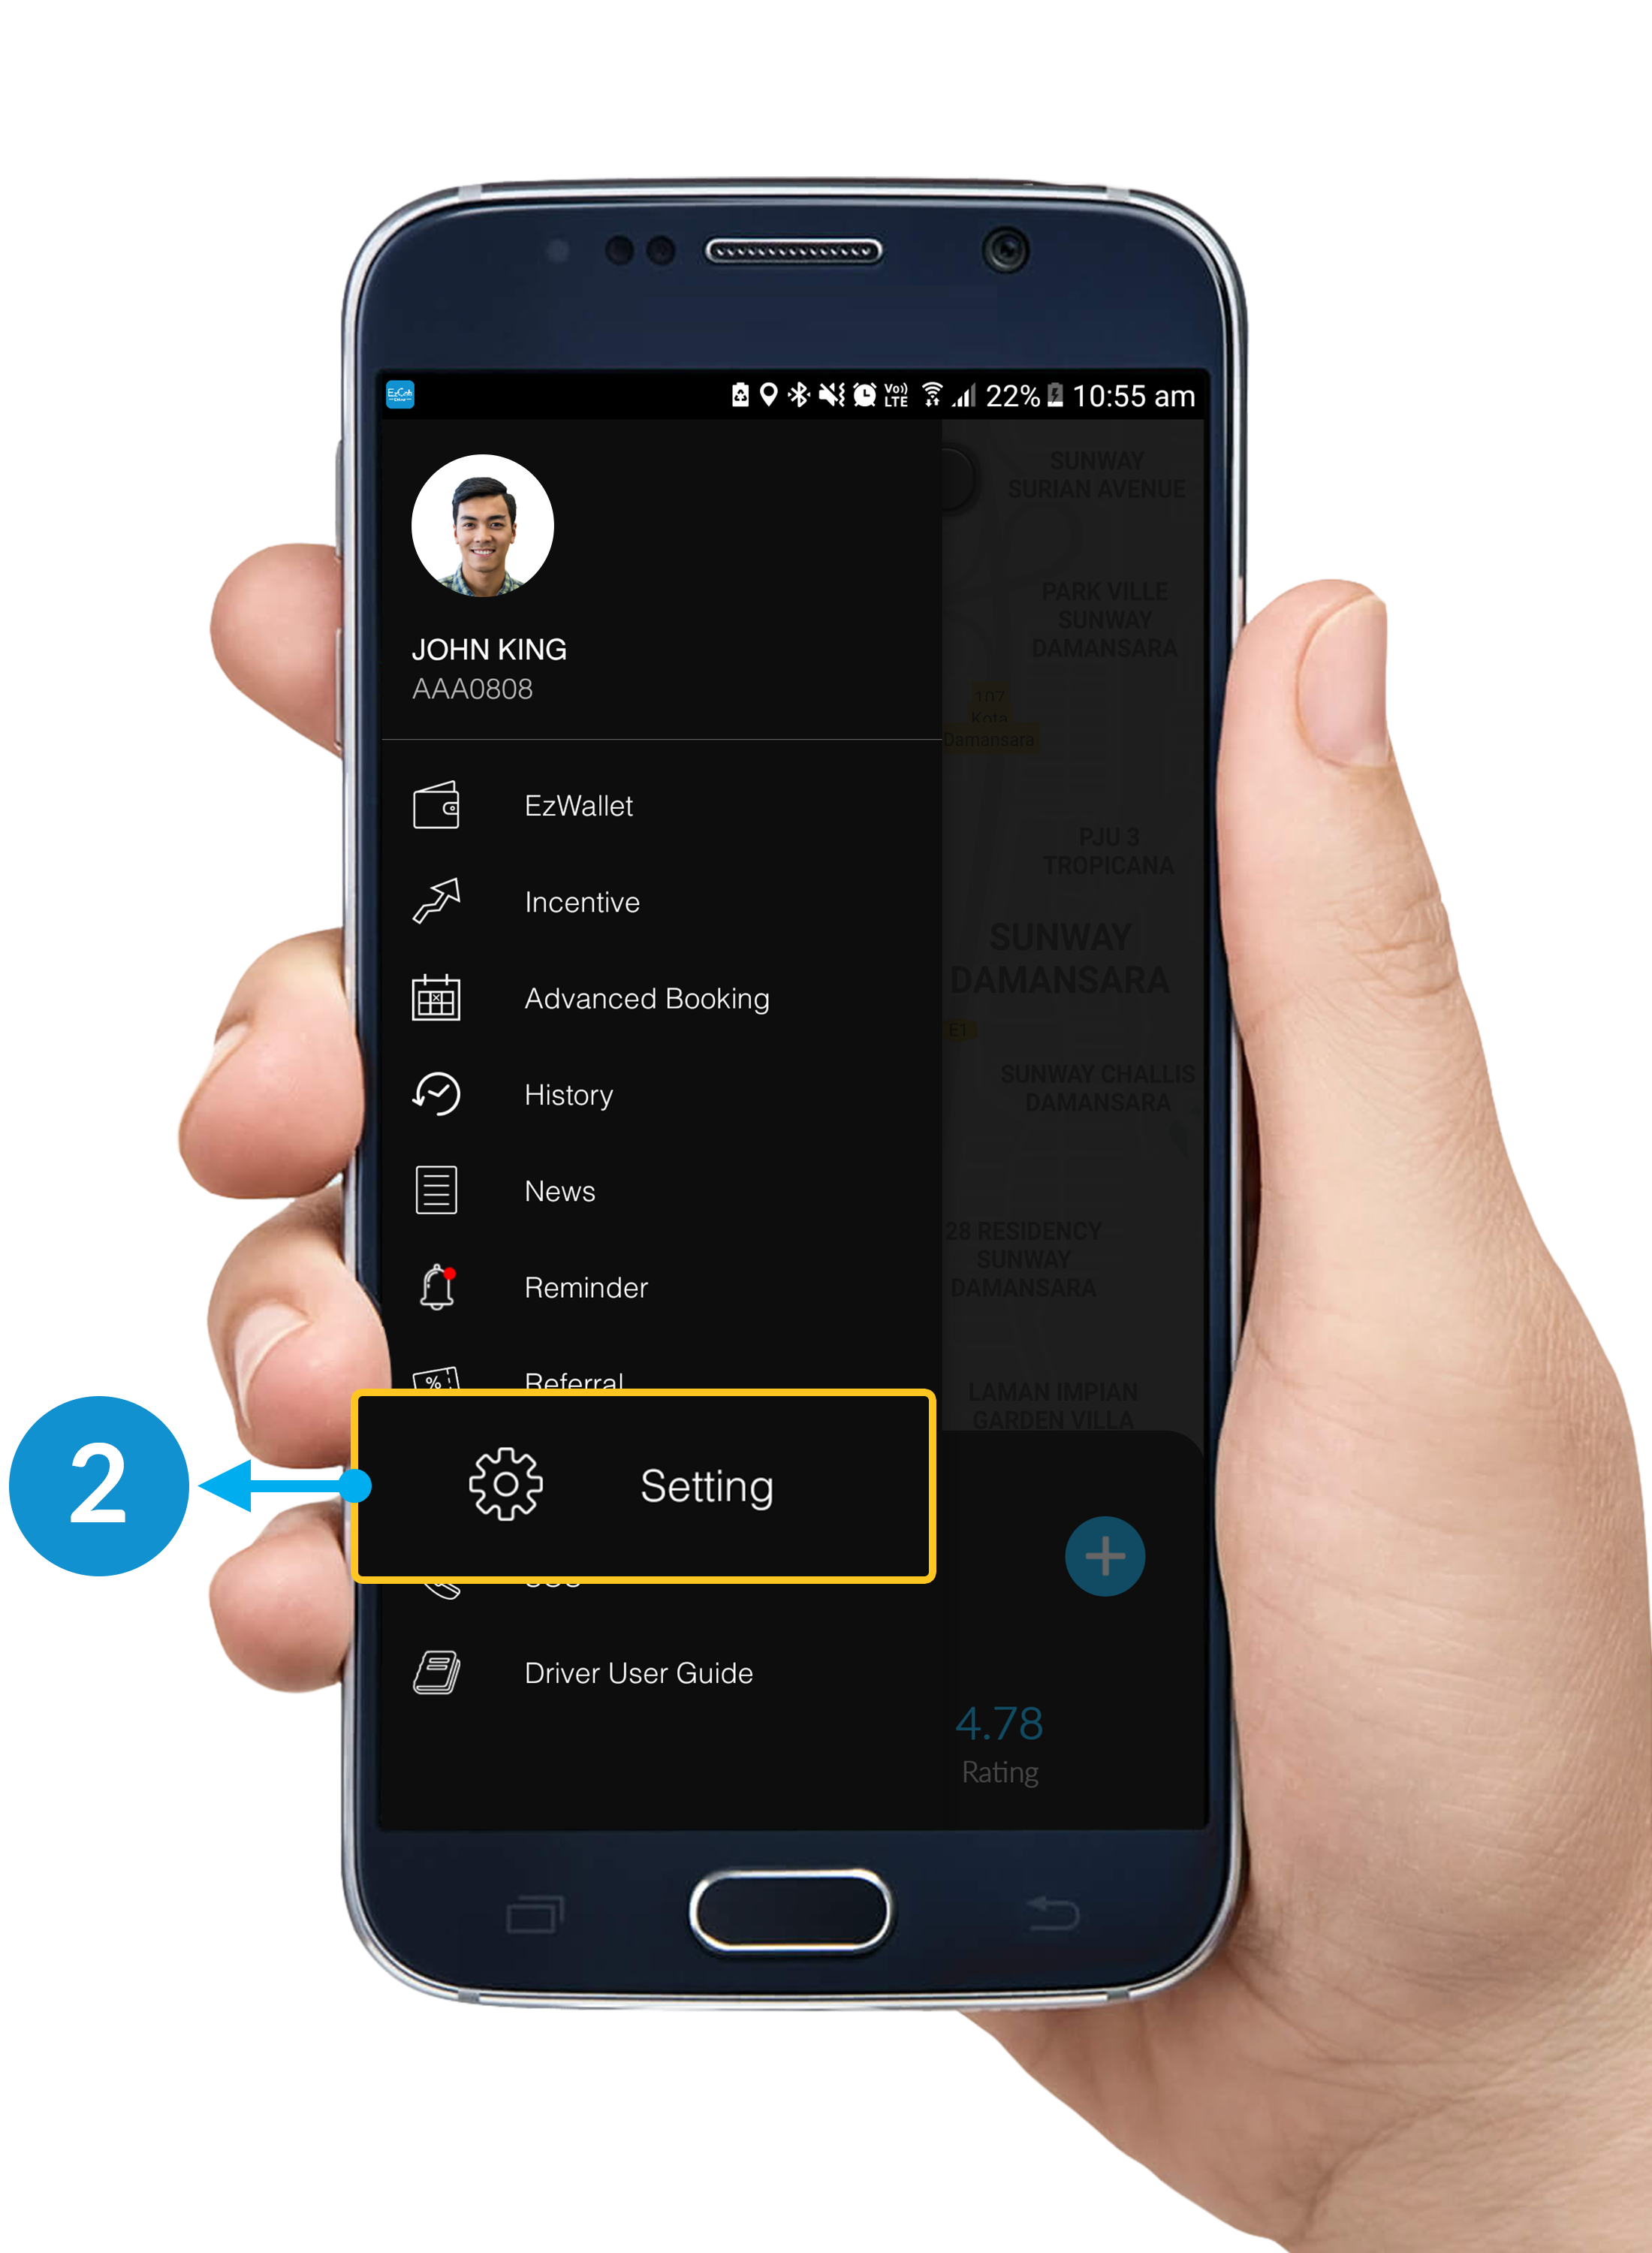
Step 2
Click Setting.
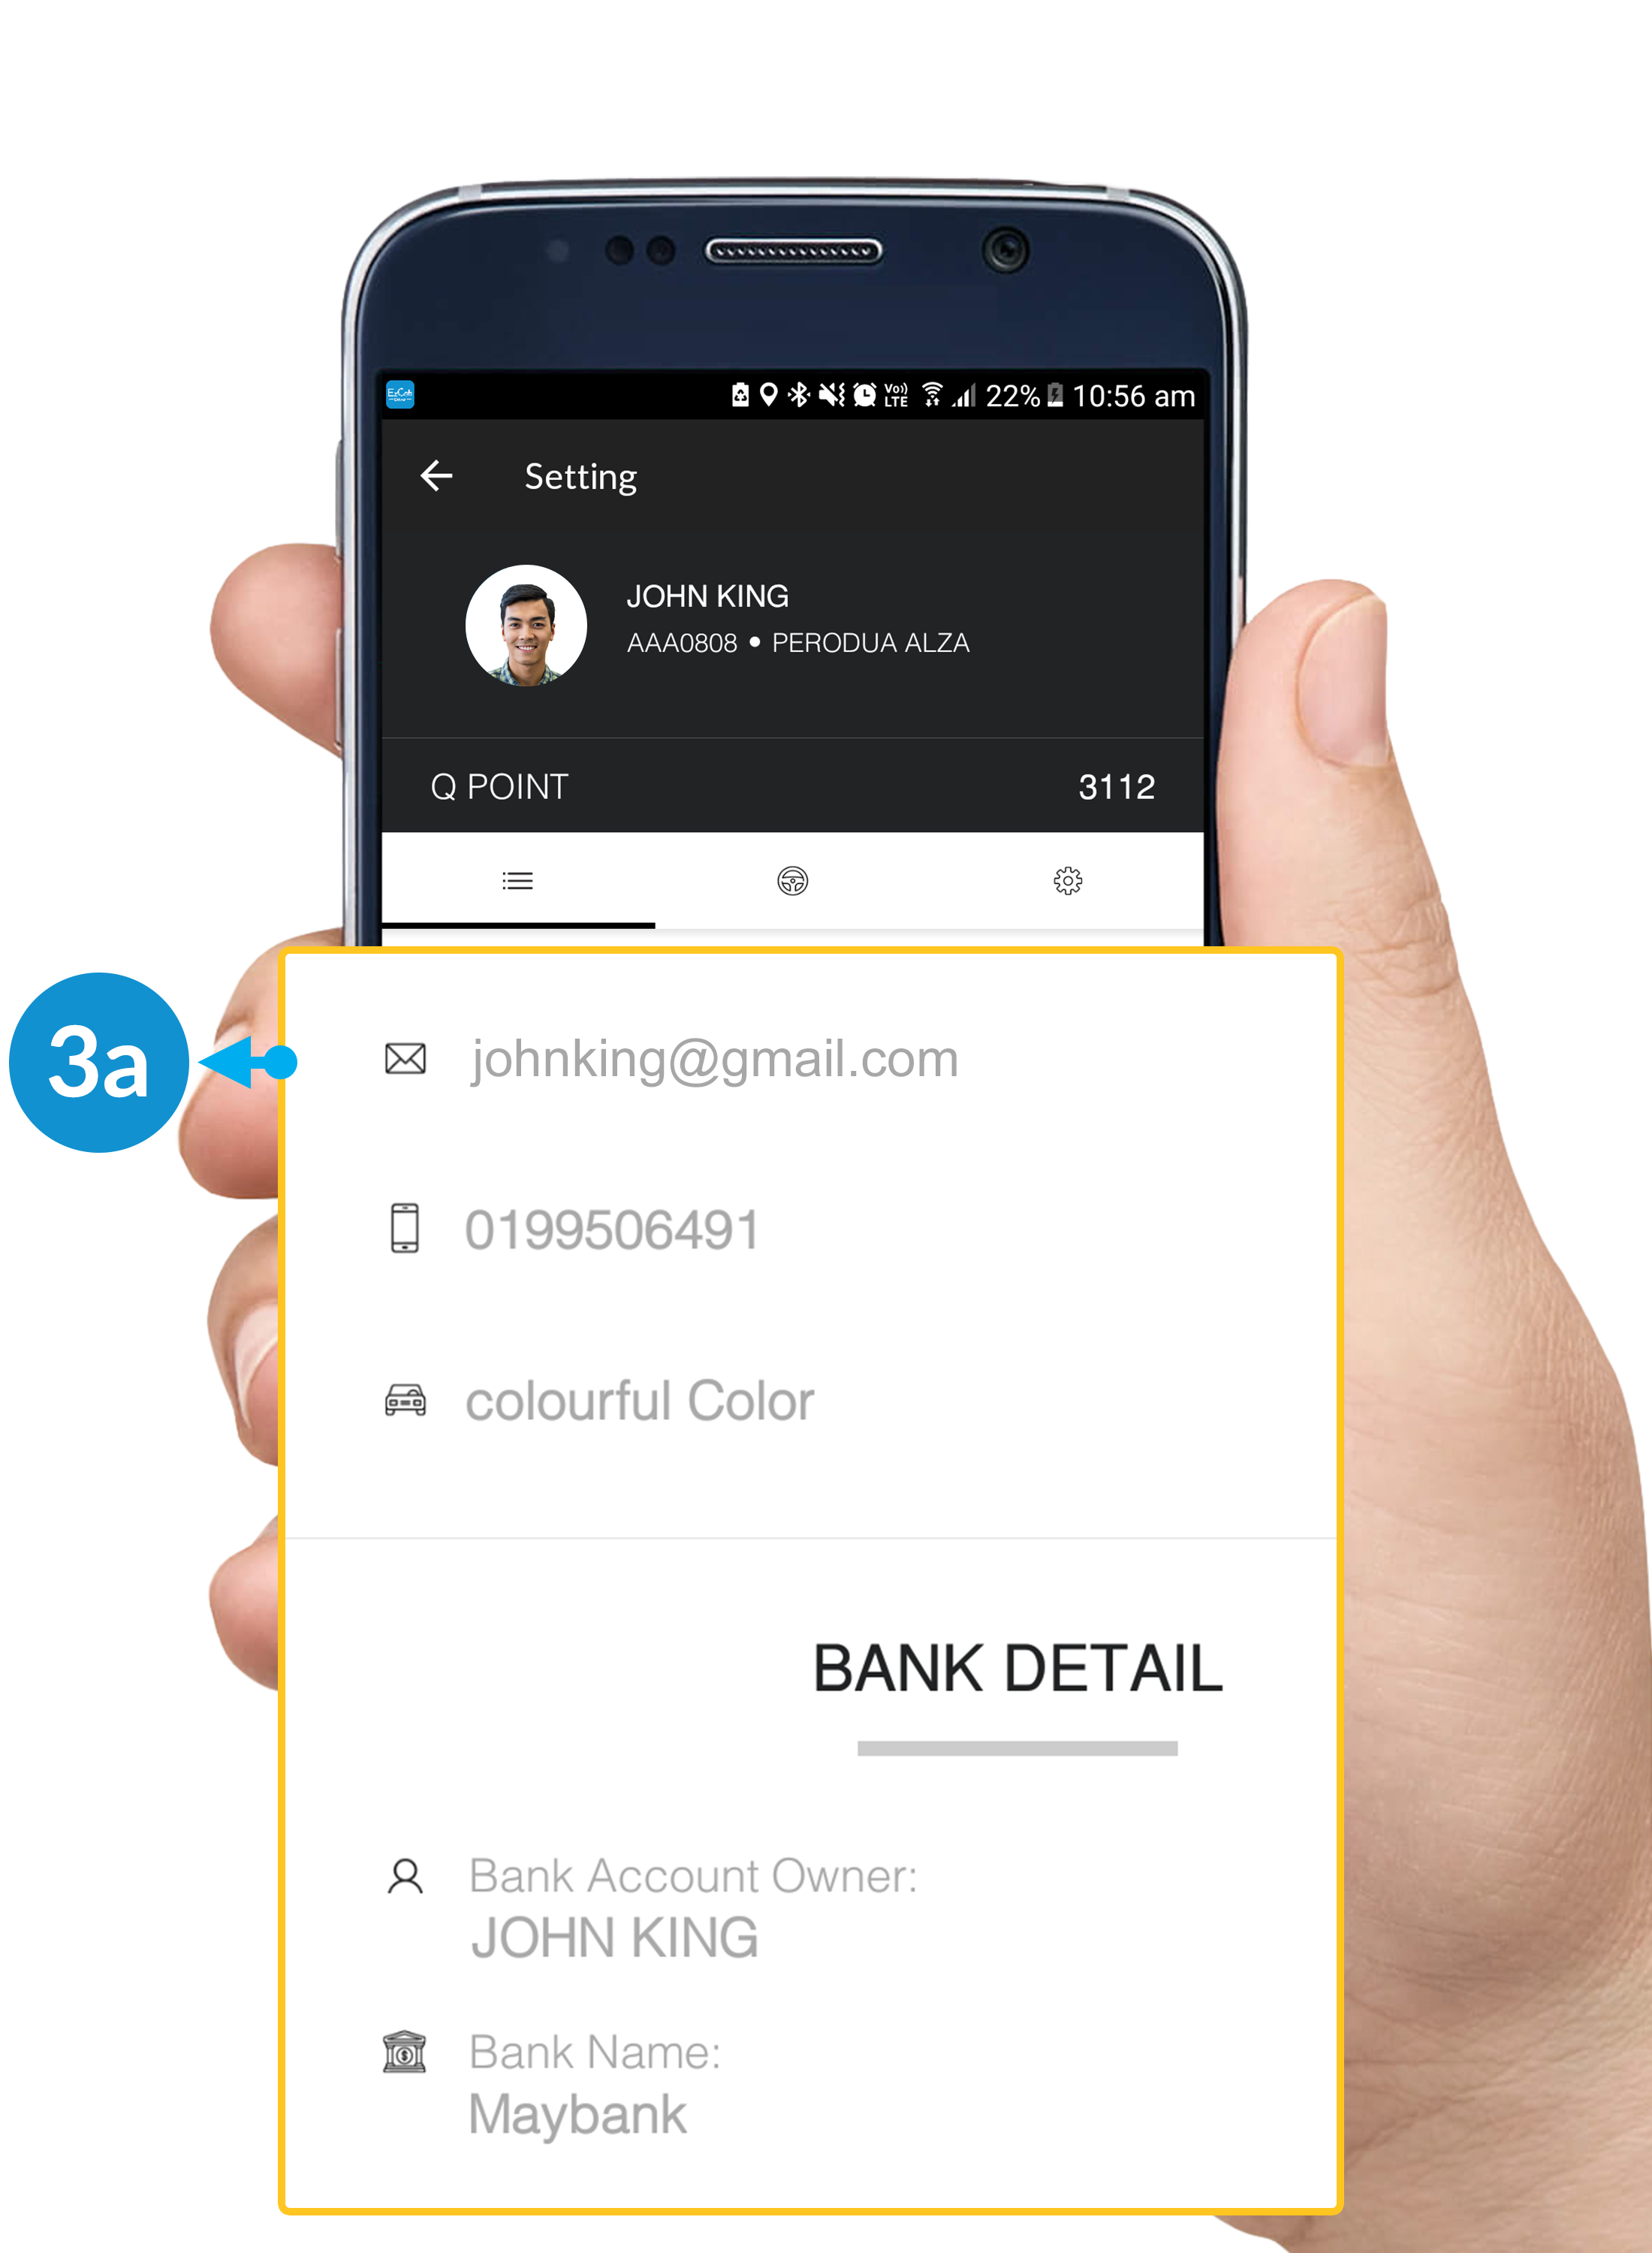
Step 3a
3a. Profile Setting:
- Email Address.
- Phone Number.
- Colour of Car.
If you need further assistance to update your details, kindly email to support@ezcab.com.my.
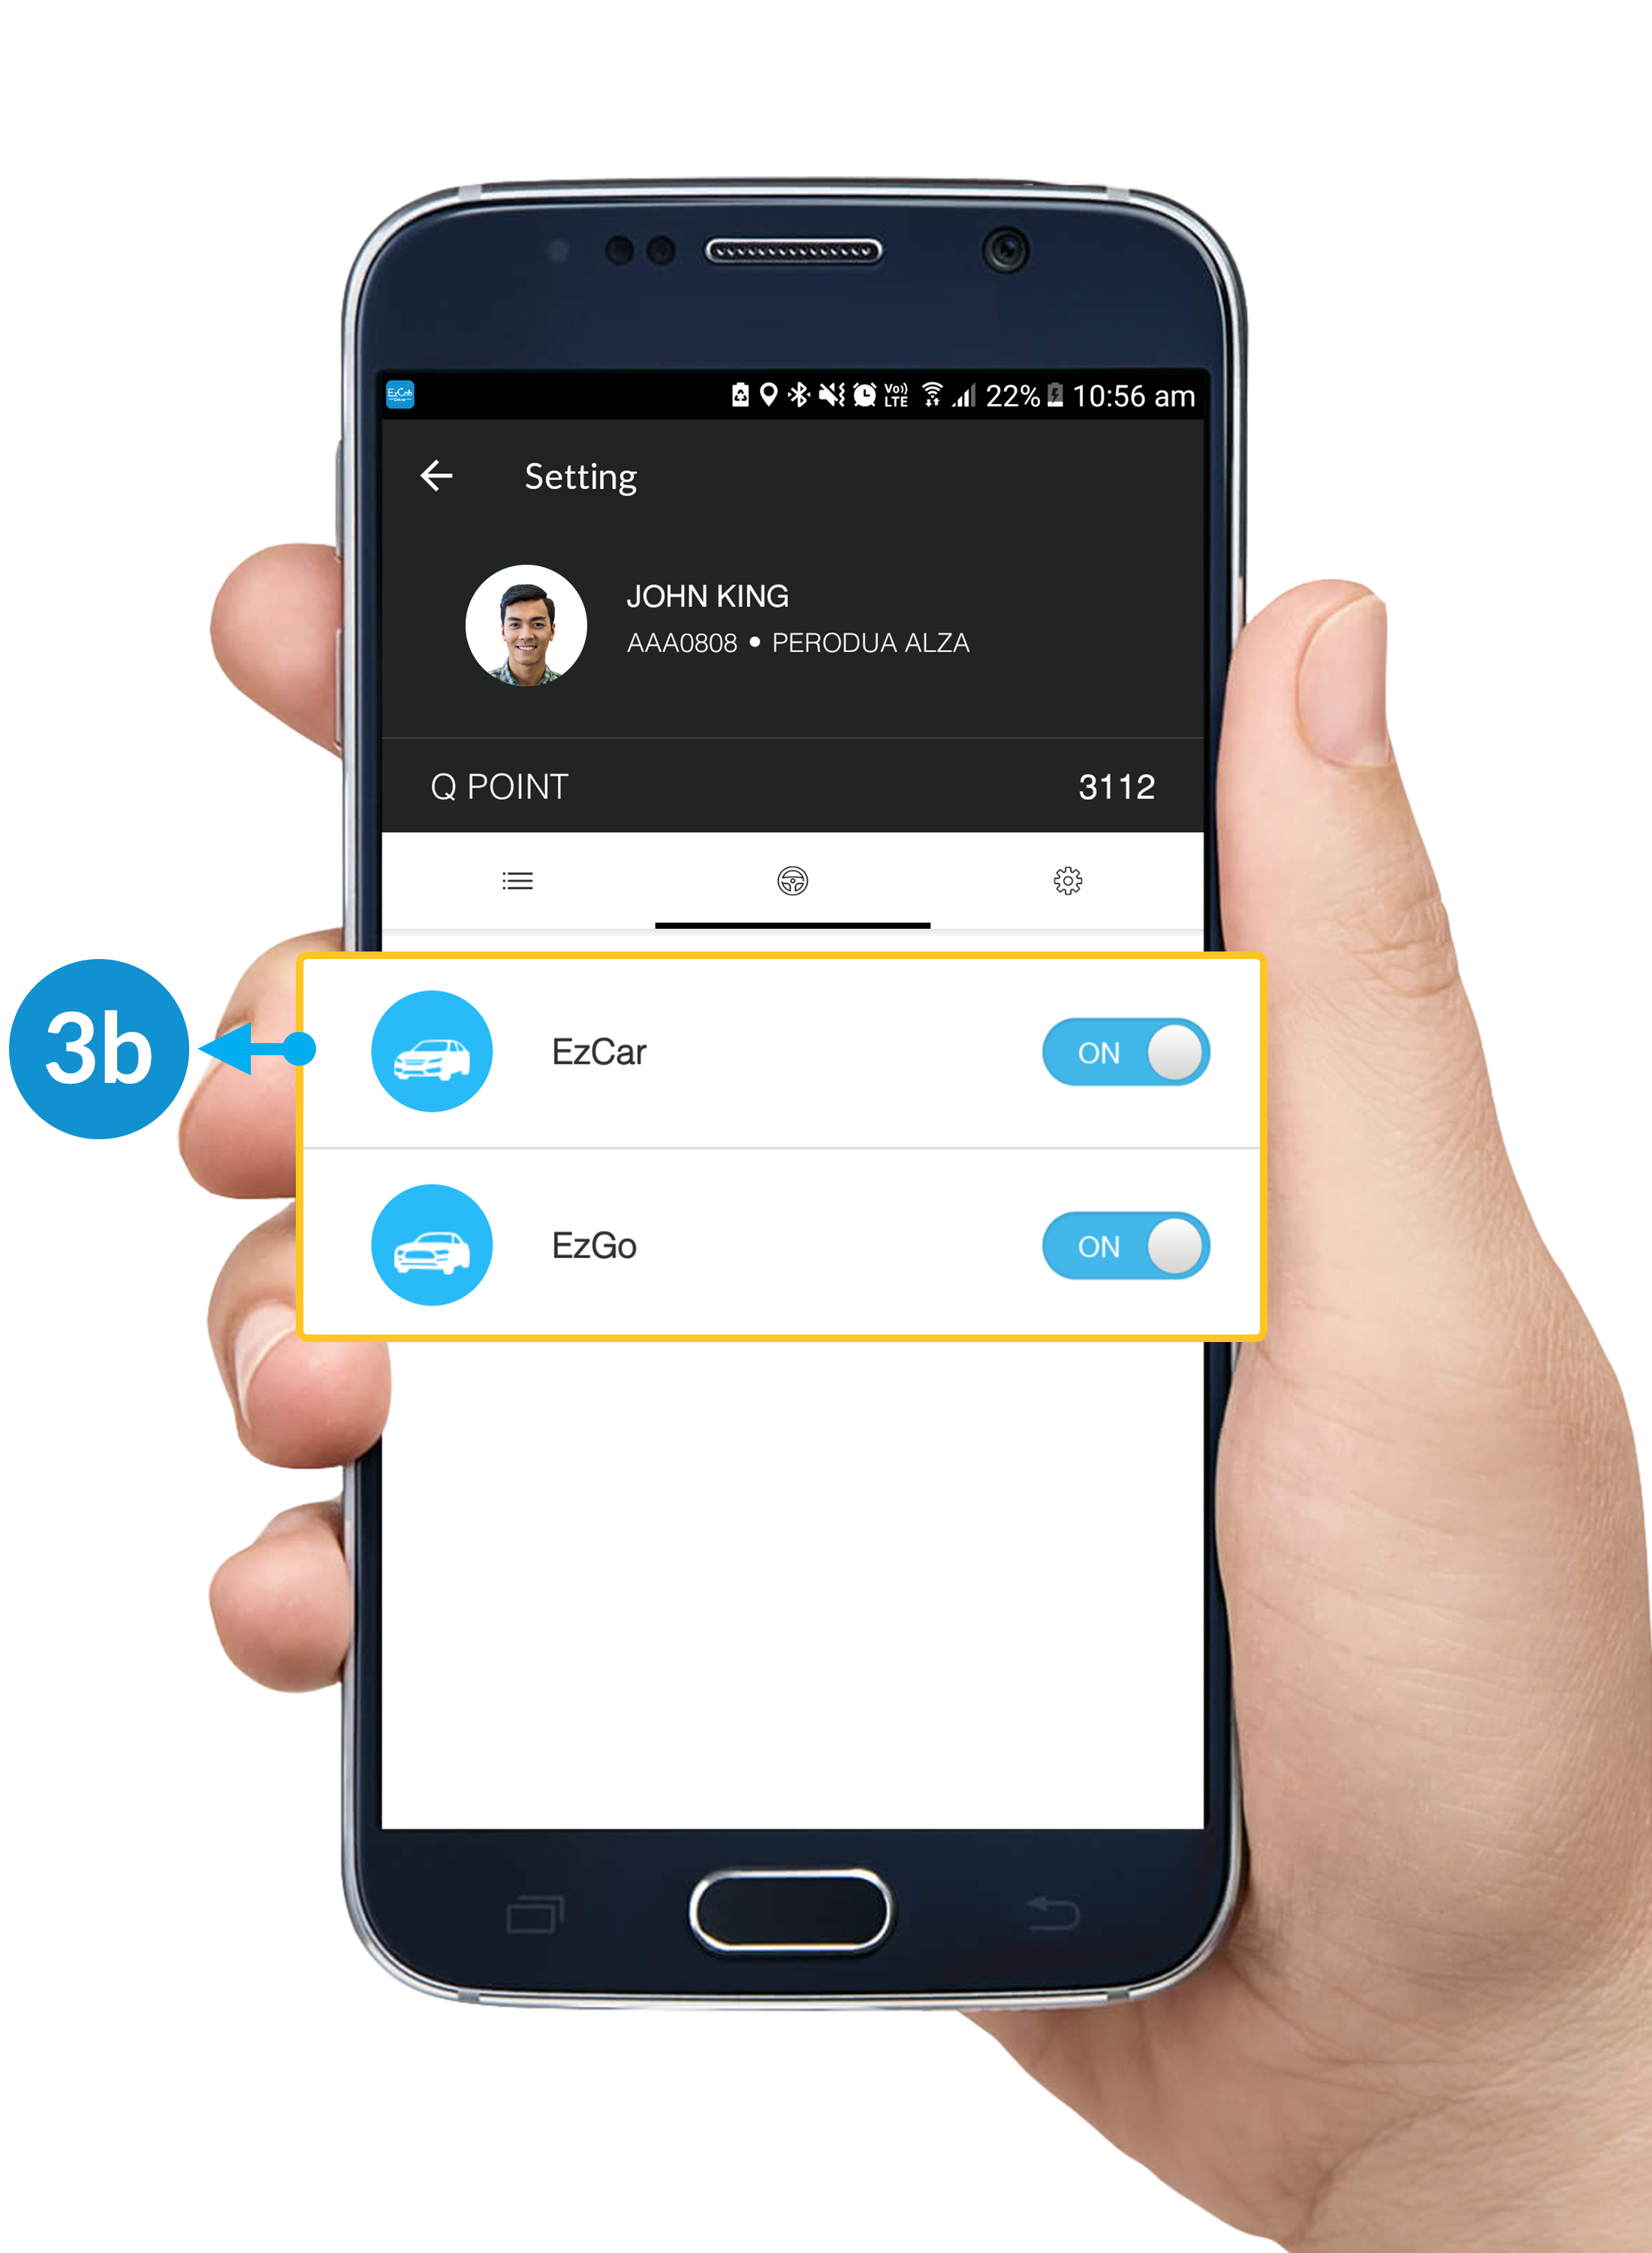
Step 3b
3b. Service Setting:
Kindly switch ON/OFF according your preference on Services Type.
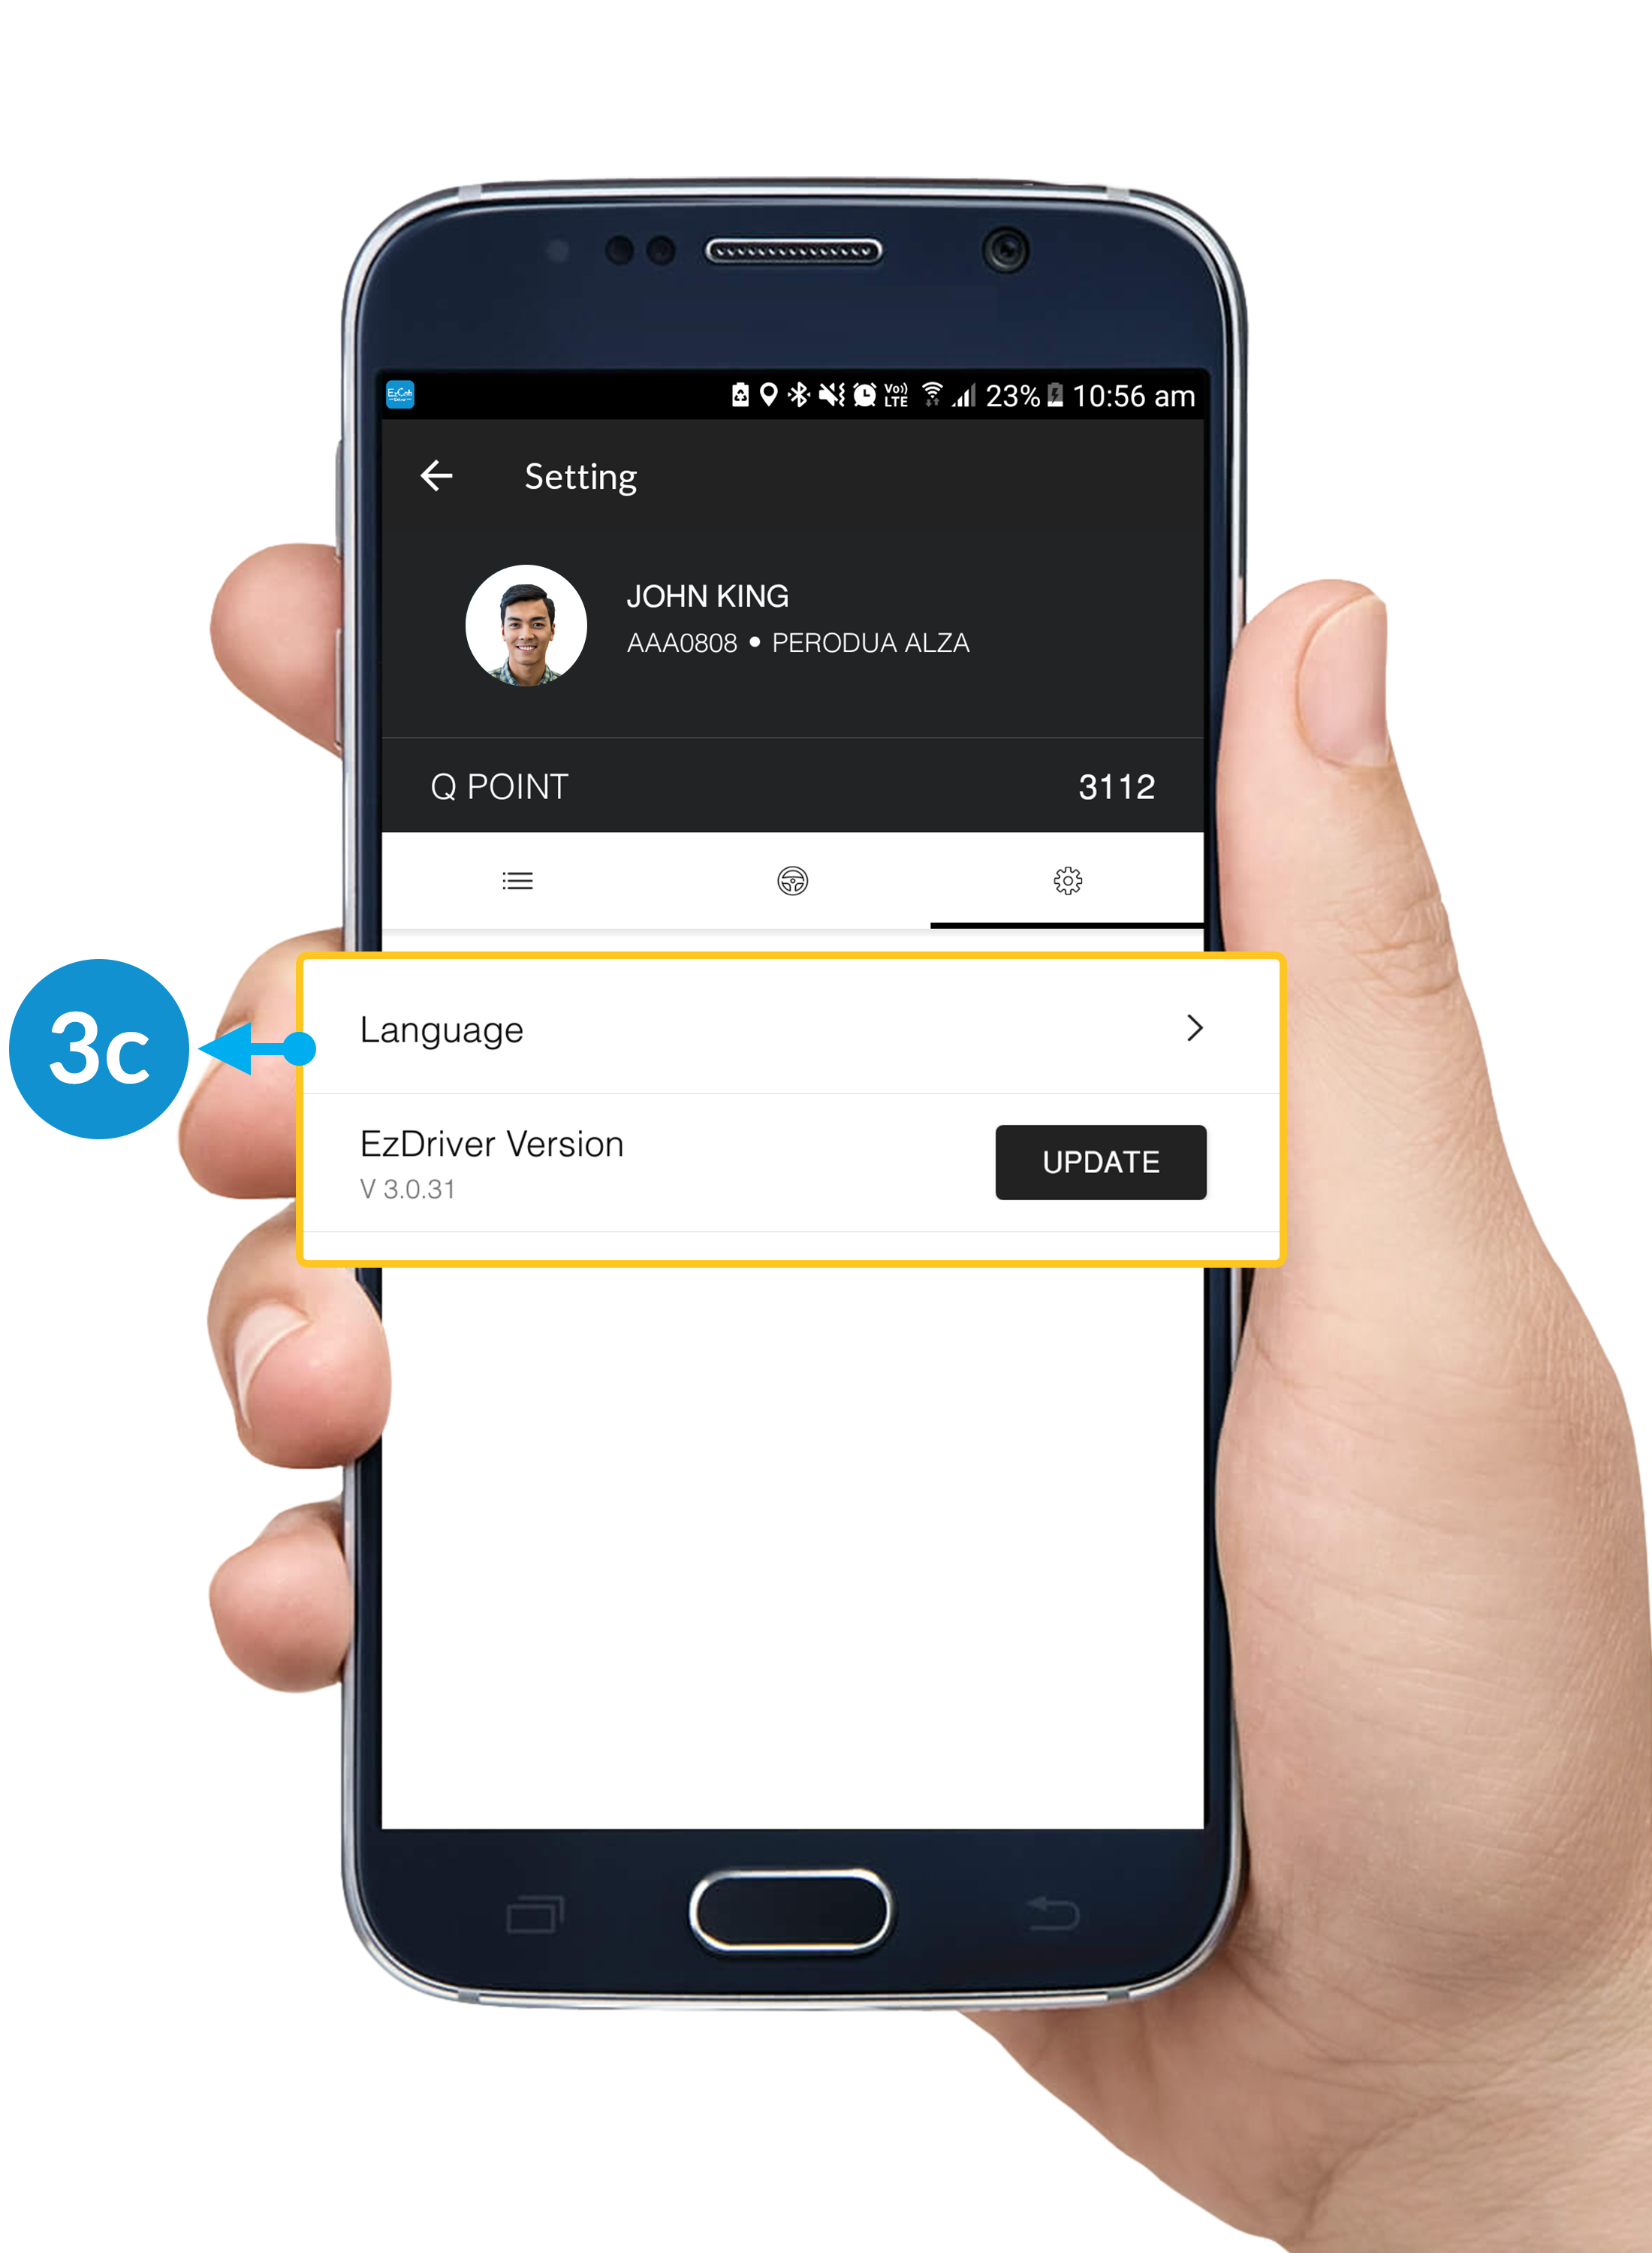
Step 3c
3c. Setting:
Language Setting: Select the language you want to use.
Update Button: Click to update your EzDriver App to the latest version.
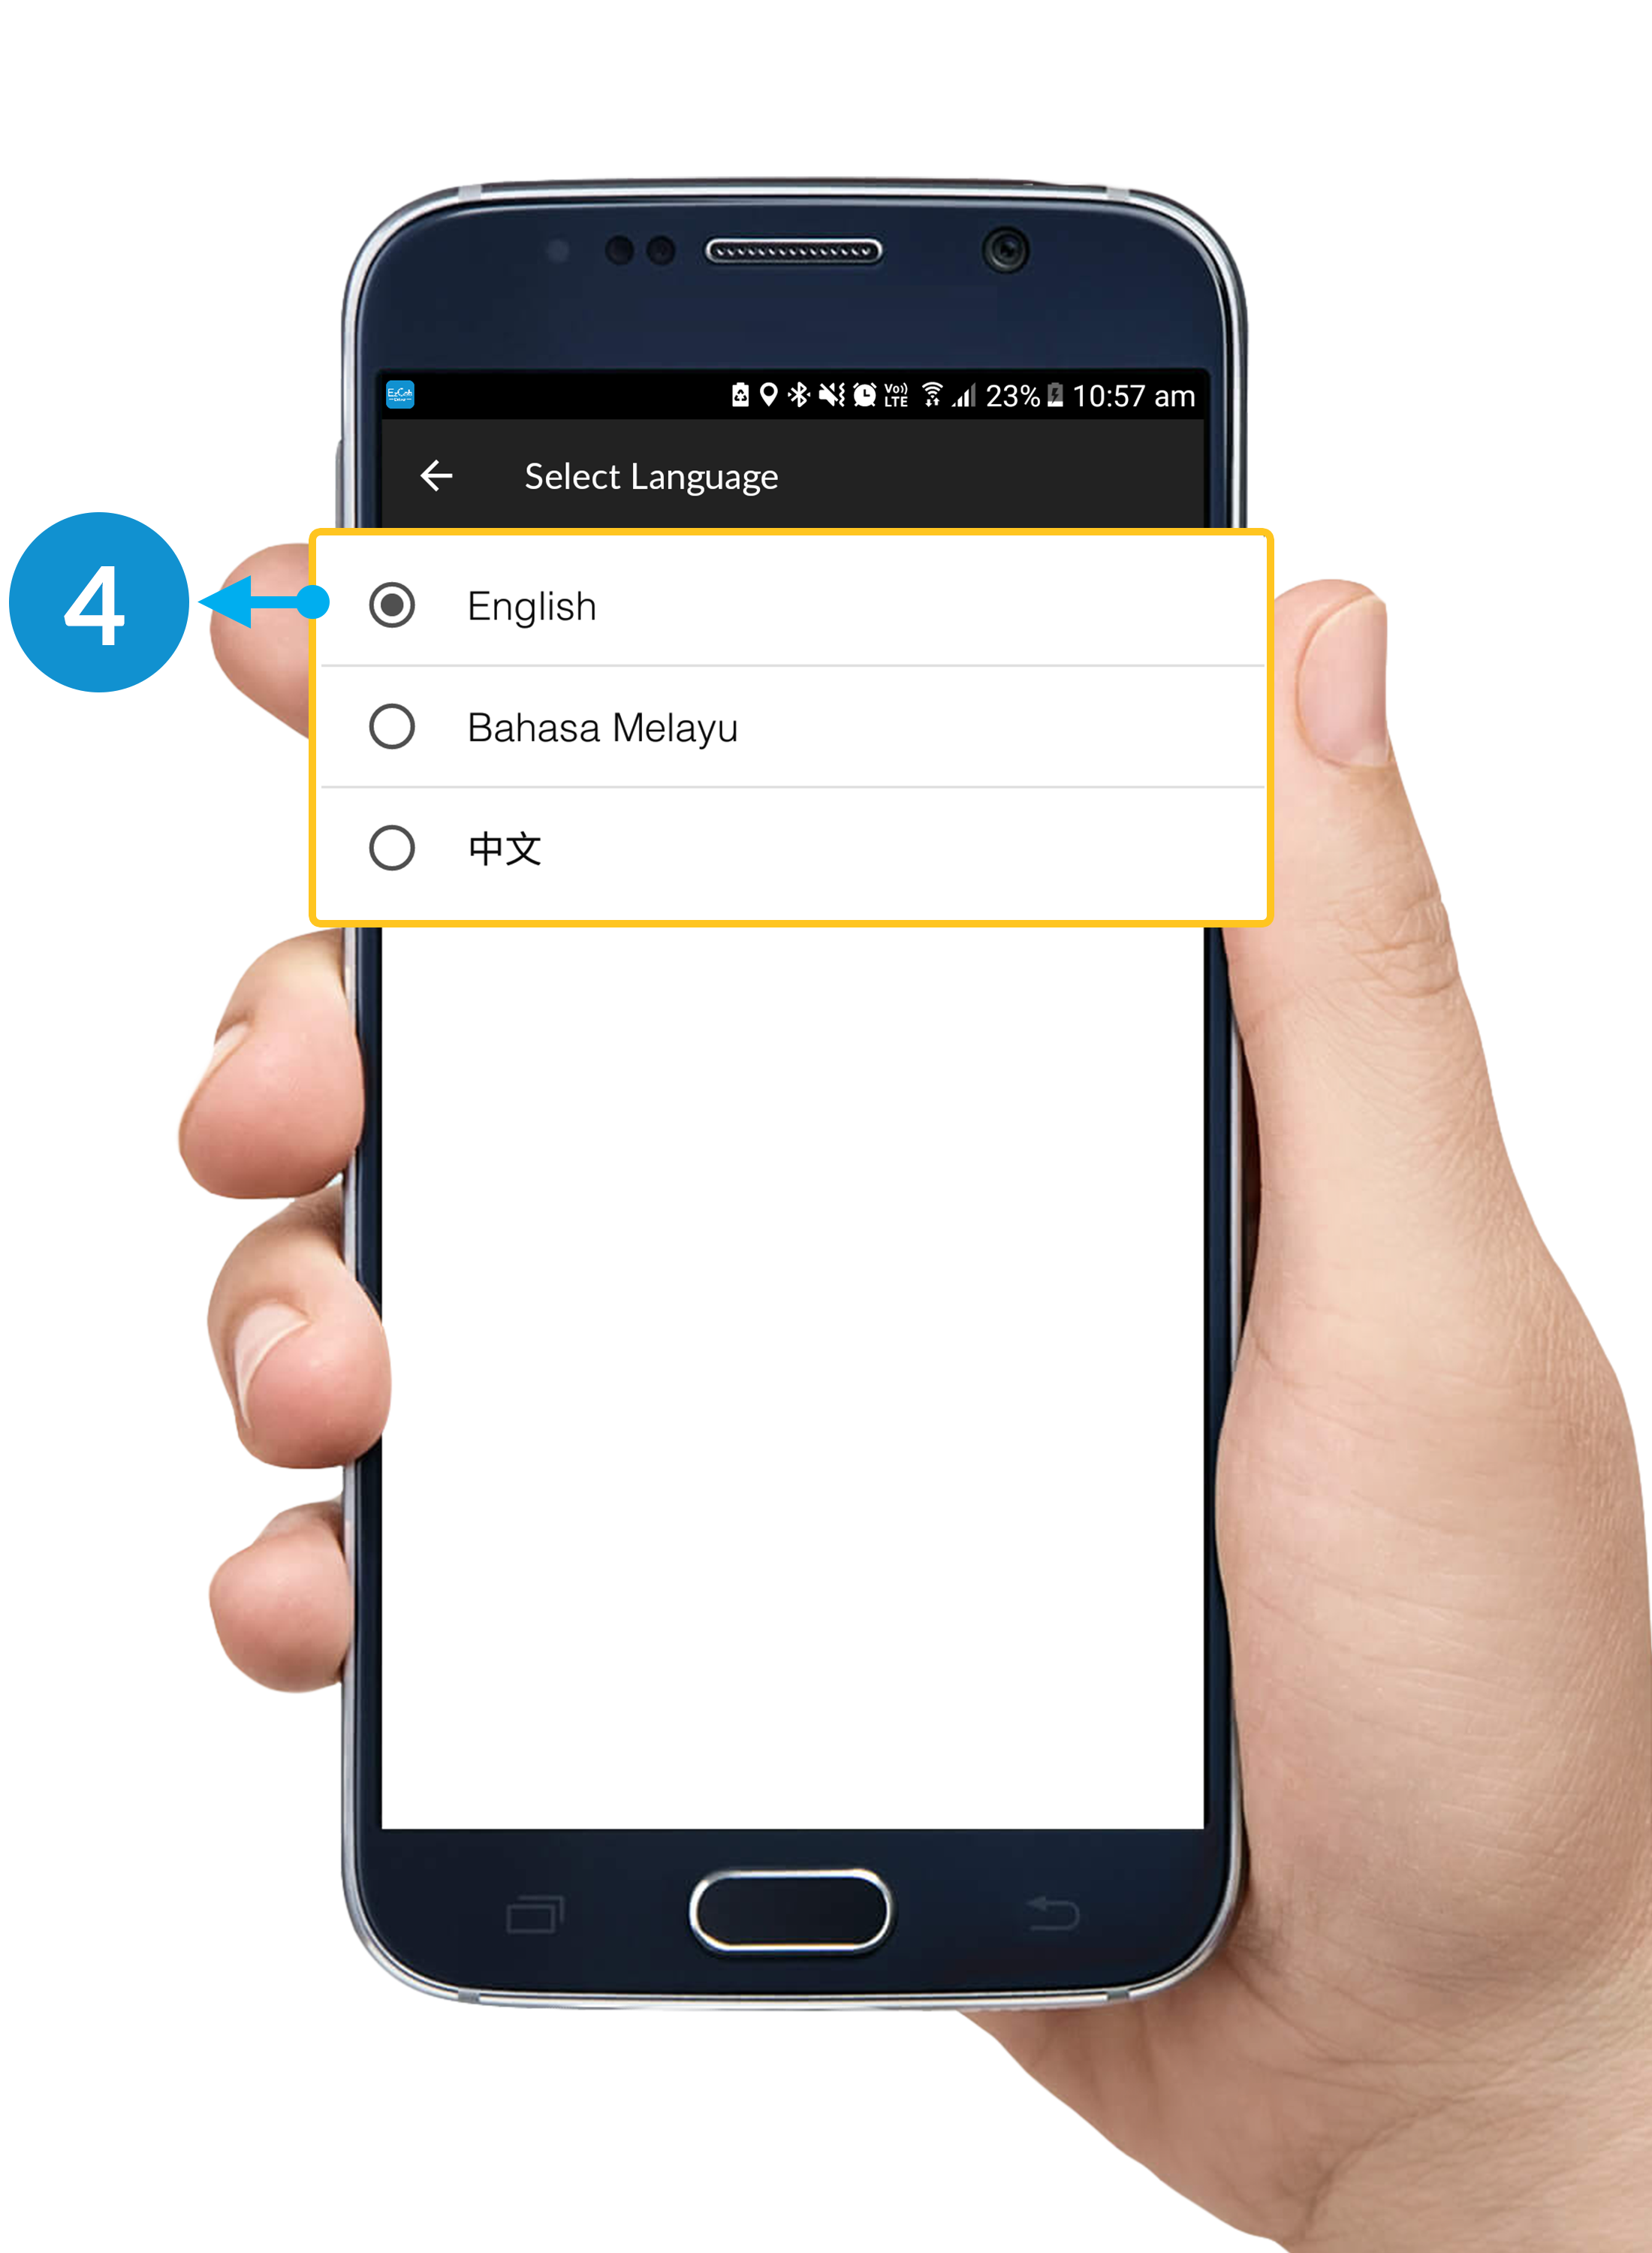
Step 4
To change your language settings, follow
Step 1 > Step 2 > Step 3c > Step 4:
Language Select: Select the language you wish to change.
Back Button: After choosing the language, click the back button on your upper-left corner.
How To Use SOS
Step 1
Click the button on your upper-left corner.
*Please make sure that you're on Standby Mode.
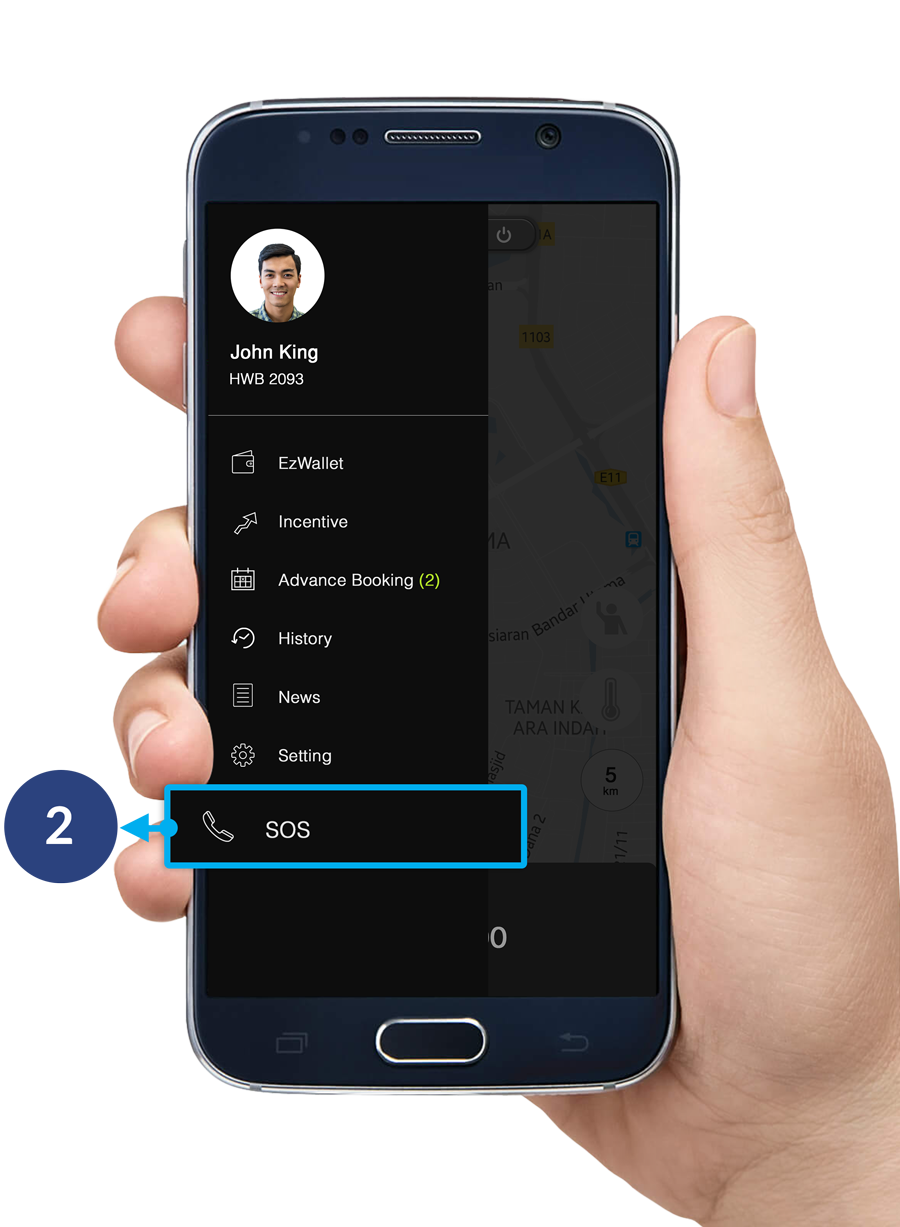
Step 2
Click SOS.
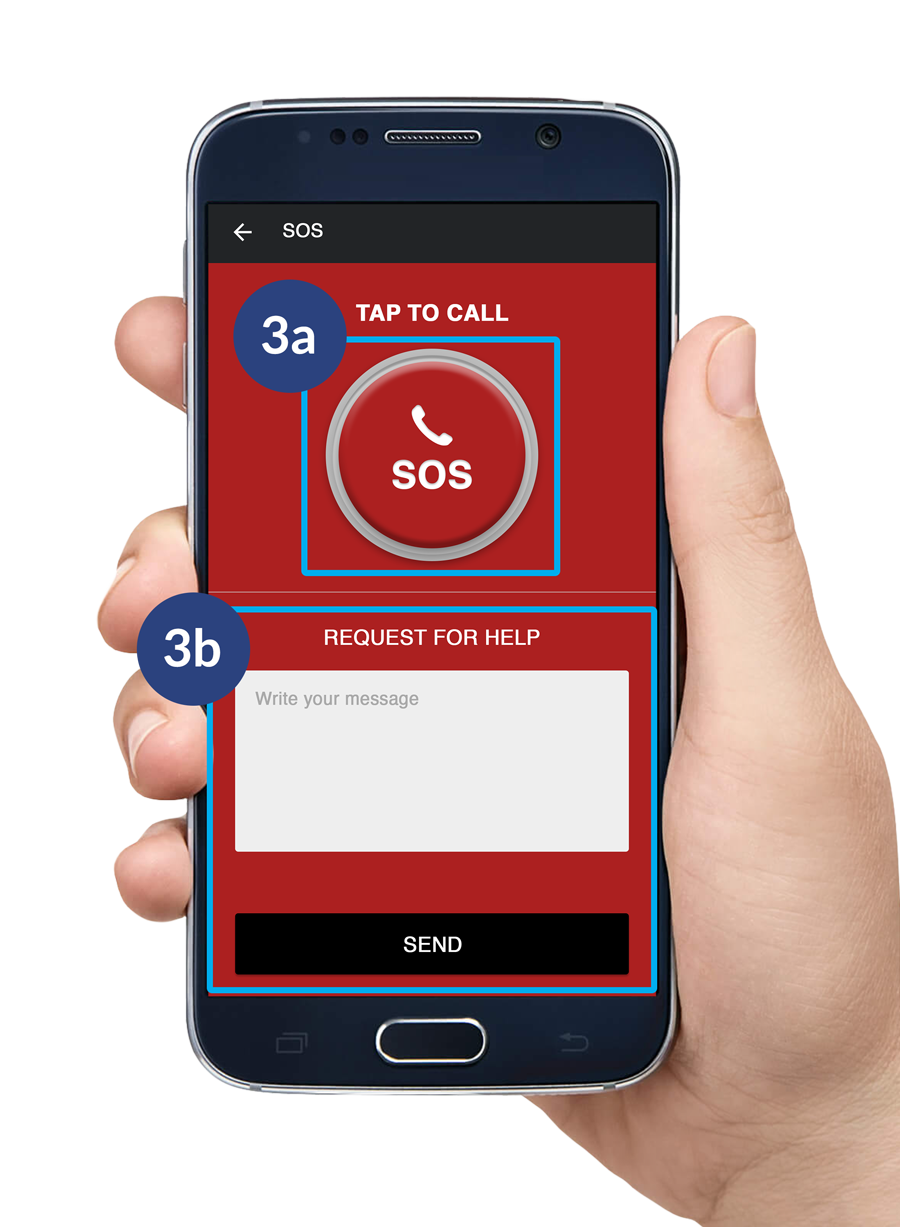
Step 3
There are 2 ways to use the SOS.
3a. SOS Button: To call for help.
3b. Text & Send: Enter your message and click the send button to get help.